> ## Documentation Index
> Fetch the complete documentation index at: https://craft-support.mintlify.site/llms.txt
> Use this file to discover all available pages before exploring further.
# Templates
> Use Craft templates to start recurring documents faster, convert existing documents into templates, and keep your own repeatable workflows consistent.
**Templates** help you start recurring work faster. Use our built-in **Template Gallery** for ready-made layouts, or create your own templates for documents you rebuild often, such as meeting notes, weekly updates, project briefs, journals, or planning documents.
Create a template when you use the same structure more than once. If the document is a one-off, duplicating it may be enough. If it becomes part of your routine, turn it into a template.
## Open your templates
The location of **Templates** is different depending on the platform you use.
Open **Settings**, then select **Templates** under **Space Settings**.
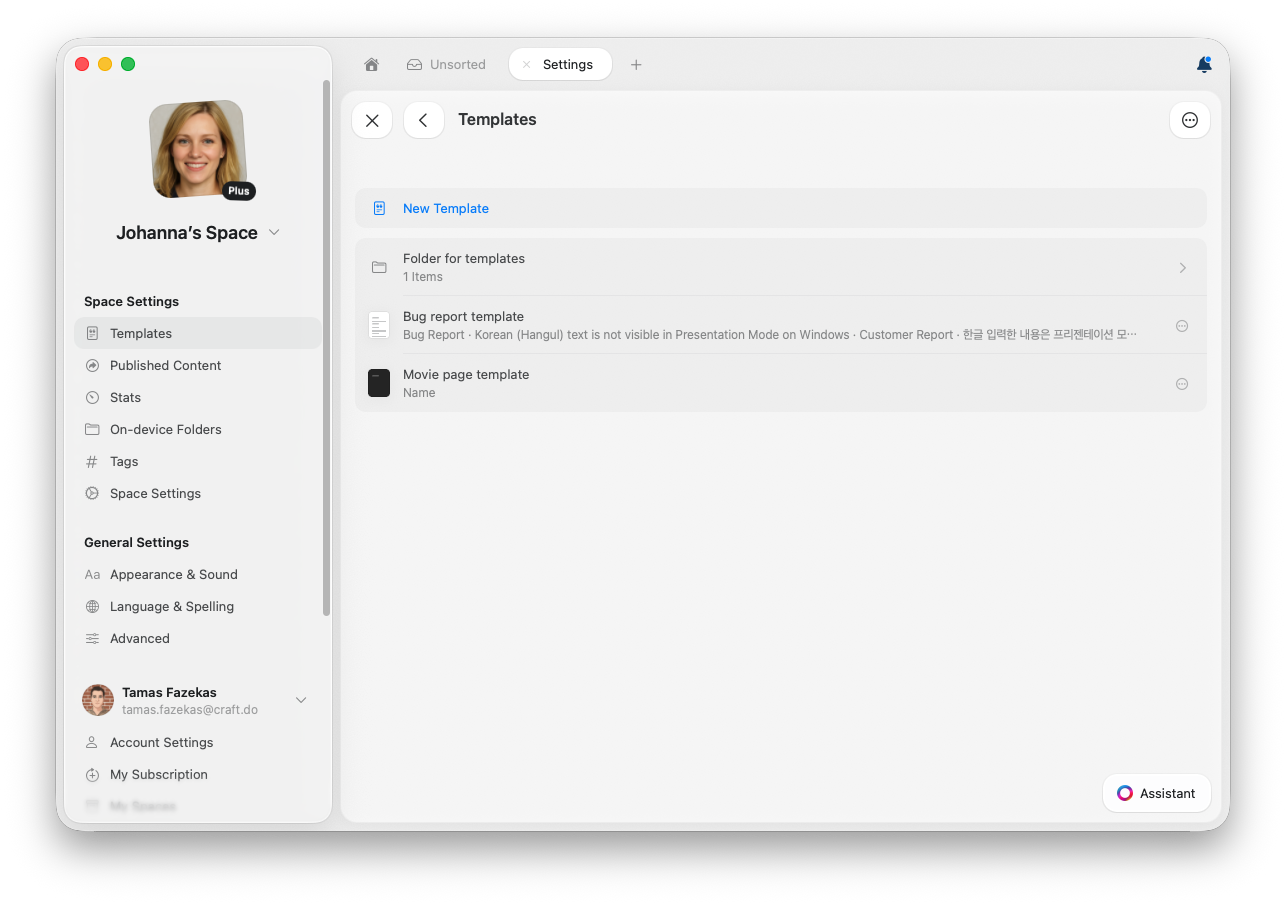 From here, you can create, open, edit, or manage templates in the current space.
Select **My Templates** in the sidebar.
From here, you can create, open, edit, or manage templates in the current space.
Select **My Templates** in the sidebar.
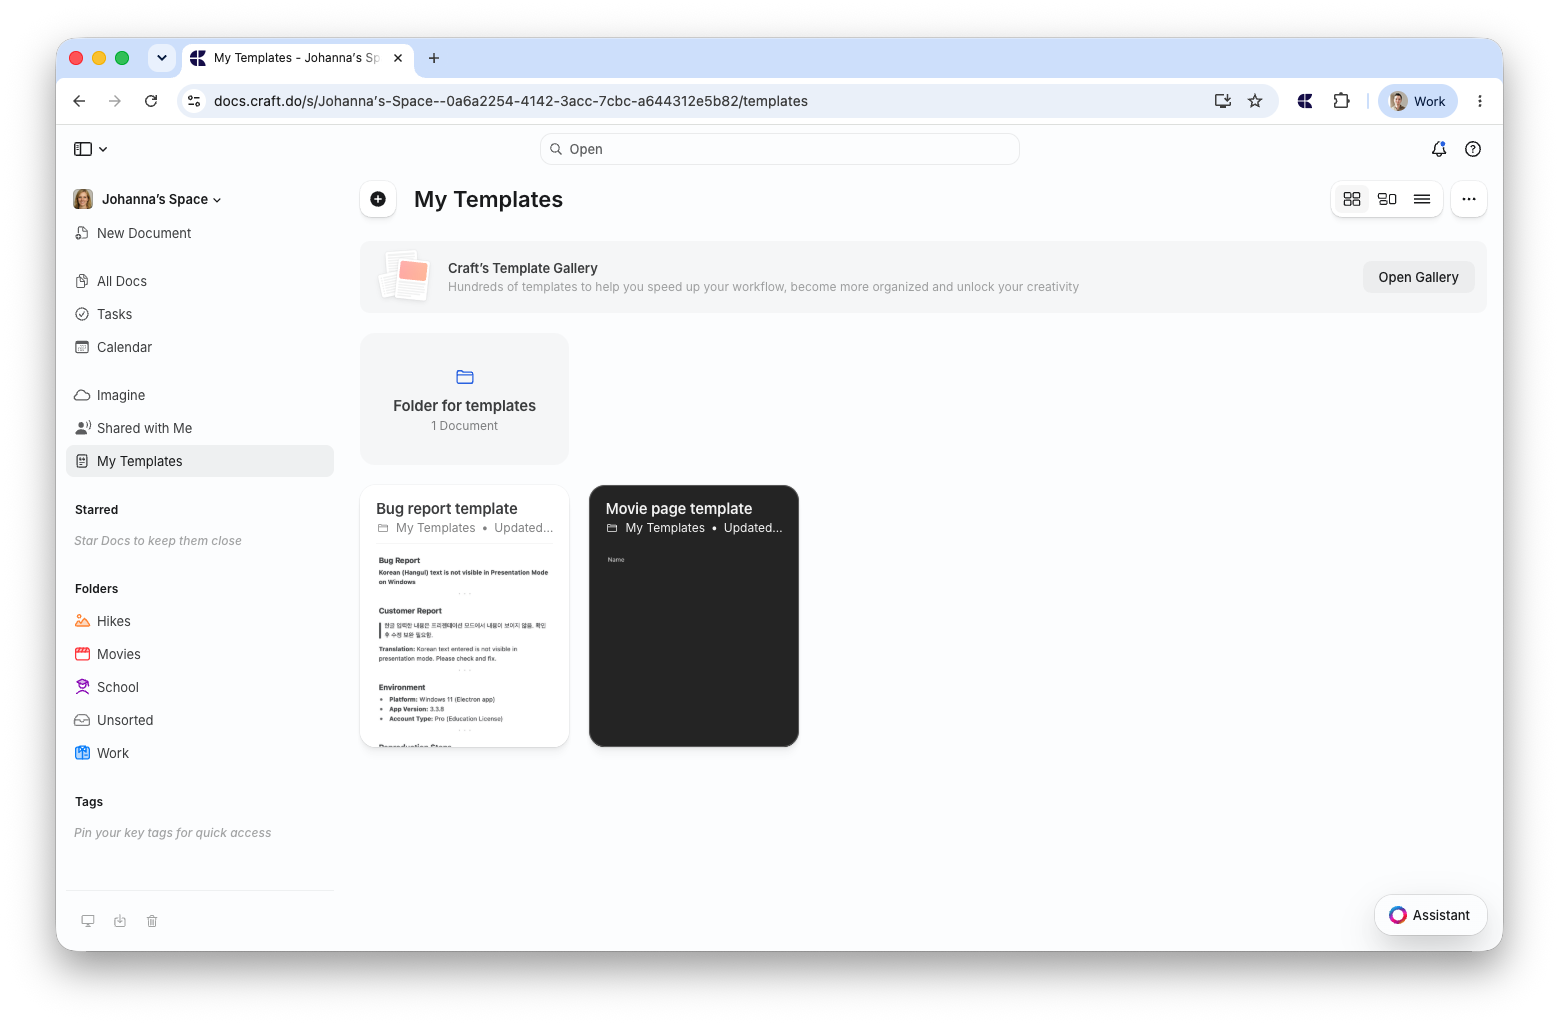 From here, you can use your templates or click **Open Gallery** to browse our built-in Template Gallery.
Tap your **All Docs** folder, then tap **Templates** to open the gallery. Browse through the available templates and tap any template to create a new document based on it.
Your templates are saved to the current space. If you use multiple spaces, switch to the right space before creating or editing templates.
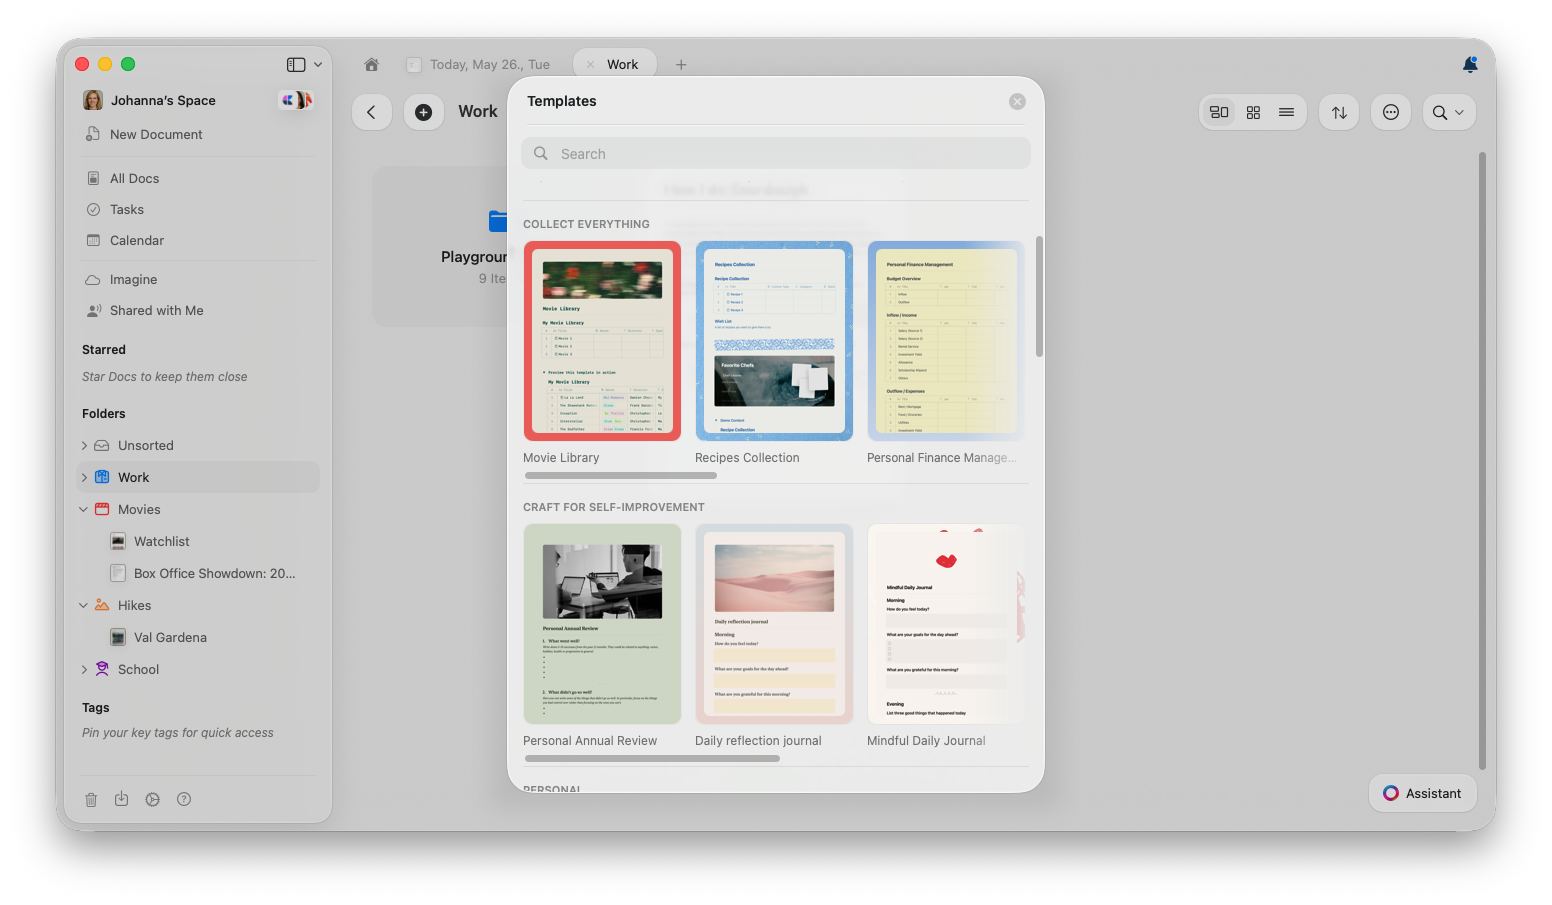
Our built-in **Template Gallery** is a great starting point, with ready-made layouts for journals, planners, trackers, and more.
From here, you can use your templates or click **Open Gallery** to browse our built-in Template Gallery.
Tap your **All Docs** folder, then tap **Templates** to open the gallery. Browse through the available templates and tap any template to create a new document based on it.
Your templates are saved to the current space. If you use multiple spaces, switch to the right space before creating or editing templates.
Our built-in **Template Gallery** is a great starting point, with ready-made layouts for journals, planners, trackers, and more.
 ## Create a custom template
You can create a template from scratch, or convert an existing document into one.
### Create a new template from scratch
Use this when you already know the structure you want, but do not have an existing document to reuse.
Go to **Settings → Templates**.
Select **New Template**.
Add the sections, placeholder text, styling, cover image, tables, or other content you want to reuse.
The template appears in **Templates** and can be used to create new documents.
Select **My Templates** in the sidebar.
Click the **+** button next to the **My Templates** title to start a new template.
Add the sections, placeholder text, styling, cover image, tables, or other content you want to reuse.
The template appears in **My Templates** and can be used to create new documents.
### Convert an existing document into a template
Use this when you already have a document with the right structure and want to reuse it as the starting point for future documents.
**Move to...** changes the current document's location. If you also need to keep the original as a normal document, duplicate it first, then move the duplicate to **My Templates**.
Open the document you want to reuse as a template.
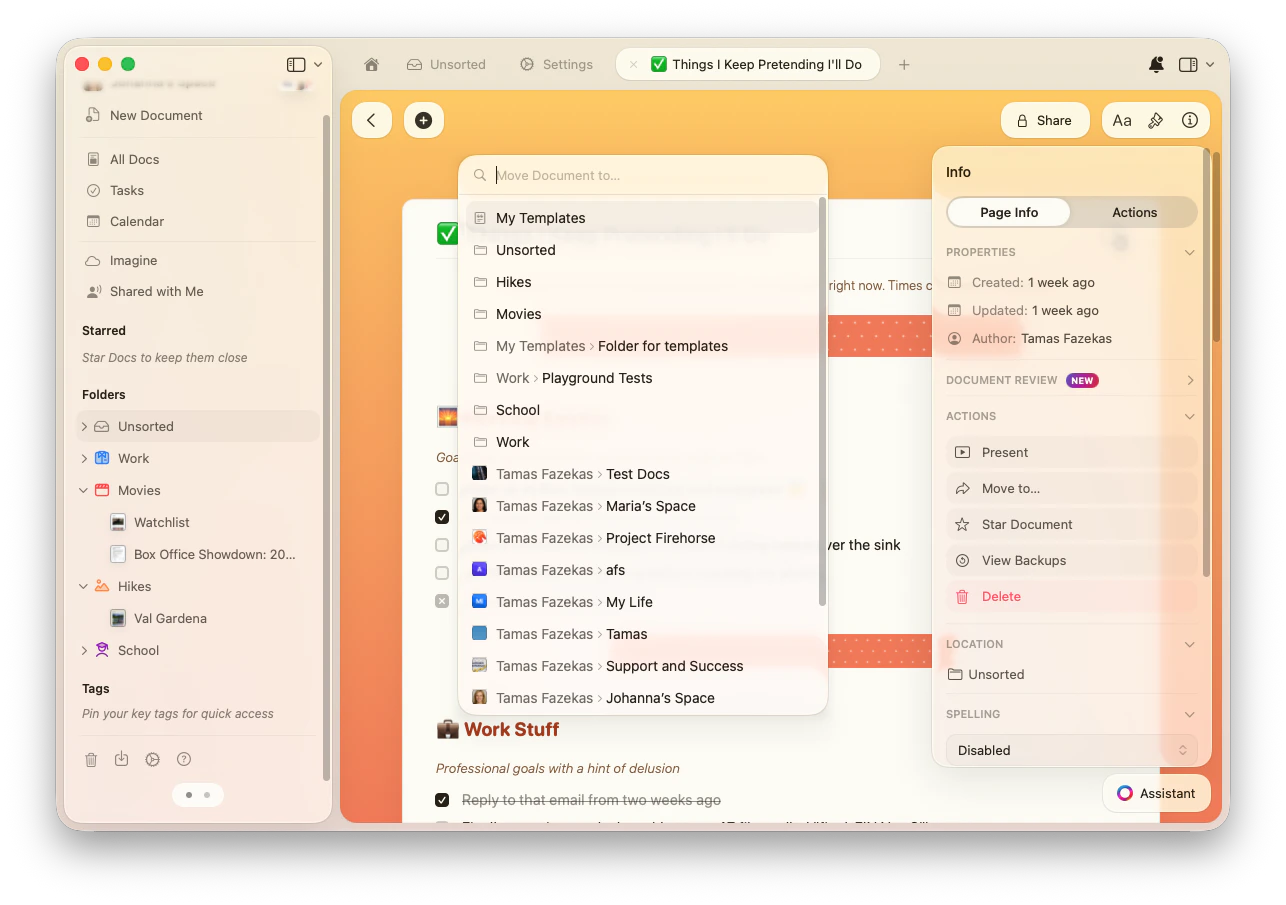
Click the **Info (i)** button in the top-right, or open the right sidebar and select **Info**.
In the **Actions** section, select **Move to...**.
Select **My Templates** as the destination. You can also choose a folder inside **My Templates**.
## Create a custom template
You can create a template from scratch, or convert an existing document into one.
### Create a new template from scratch
Use this when you already know the structure you want, but do not have an existing document to reuse.
Go to **Settings → Templates**.
Select **New Template**.
Add the sections, placeholder text, styling, cover image, tables, or other content you want to reuse.
The template appears in **Templates** and can be used to create new documents.
Select **My Templates** in the sidebar.
Click the **+** button next to the **My Templates** title to start a new template.
Add the sections, placeholder text, styling, cover image, tables, or other content you want to reuse.
The template appears in **My Templates** and can be used to create new documents.
### Convert an existing document into a template
Use this when you already have a document with the right structure and want to reuse it as the starting point for future documents.
**Move to...** changes the current document's location. If you also need to keep the original as a normal document, duplicate it first, then move the duplicate to **My Templates**.
Open the document you want to reuse as a template.
Click the **Info (i)** button in the top-right, or open the right sidebar and select **Info**.
In the **Actions** section, select **Move to...**.
Select **My Templates** as the destination. You can also choose a folder inside **My Templates**.
 Templates can include text, pages, cards, images, tables, collections, formatting, cover images, icons, and backgrounds. When you create a new document from a template, a copy is created so your changes do not affect the original template.
## Use a template
### Create a new document from a template
Go to **Settings → Templates**.
Browse or search for the template you want to use.
Open the template to create a new document based on it.
Select **My Templates** in the sidebar.
Browse or search for the template you want to use.
Click the template. A new document is created based on it.
Changes you make in the new document do not change the original template.
### Insert a template into an existing document
Use this when you want to add a reusable section, checklist, or layout inside a document you are already editing.
Type **/template** in the document, then pick the template you want to insert.
When a template is inserted with the slash command, only the template's content blocks are added to the current document. Document-level settings such as cover images and backgrounds are not applied.
## Manage custom templates
You can edit, duplicate, move, or delete templates from **Settings → Templates**.
Go to **Settings → Templates**.
Click the **three-dot menu (⋯)** next to the template you want to manage.
Select **Edit**, **Duplicate**, **Move**, or **Delete**.
You can manage templates from **My Templates**.
Select **My Templates** in the sidebar.
Click the **three-dot menu (⋯)** for the template you want to manage.
Select the action you want to take, such as editing, moving, duplicating, or deleting the template.
Updating a template does not update documents that were already created from it. The changes apply the next time someone uses the template.
## Practical template examples
Instead of turning every repeated document into a template, focus on documents where the structure matters. Here are useful examples to start from.
Good for recurring team meetings, 1:1s, client calls, or project check-ins.
**Suggested structure:**
* Date and attendees
* Agenda
* Decisions made
* Action items with owners
* Open questions
* Next meeting date
Good for status reports, team updates, or personal weekly reviews.
**Suggested structure:**
* Highlights from the week
* Completed work
* In-progress work
* Blockers or risks
* Priorities for next week
* Links to related documents
Good for starting projects with the same planning structure every time.
**Suggested structure:**
* Project goal
* Scope and non-goals
* Timeline and milestones
* Stakeholders
* Key documents and resources
* Success criteria
Good for routines you repeat, such as journaling, travel planning, meal planning, or habit tracking.
**Suggested structure:**
* Goal or intention
* Checklist
* Notes section
* Important dates
* Links, files, or references
* Reflection or follow-up section
## Related Articles
Use templates with daily notes for consistent journaling
Style your templates with backgrounds and covers
Understand content structure for building templates
Templates can include text, pages, cards, images, tables, collections, formatting, cover images, icons, and backgrounds. When you create a new document from a template, a copy is created so your changes do not affect the original template.
## Use a template
### Create a new document from a template
Go to **Settings → Templates**.
Browse or search for the template you want to use.
Open the template to create a new document based on it.
Select **My Templates** in the sidebar.
Browse or search for the template you want to use.
Click the template. A new document is created based on it.
Changes you make in the new document do not change the original template.
### Insert a template into an existing document
Use this when you want to add a reusable section, checklist, or layout inside a document you are already editing.
Type **/template** in the document, then pick the template you want to insert.
When a template is inserted with the slash command, only the template's content blocks are added to the current document. Document-level settings such as cover images and backgrounds are not applied.
## Manage custom templates
You can edit, duplicate, move, or delete templates from **Settings → Templates**.
Go to **Settings → Templates**.
Click the **three-dot menu (⋯)** next to the template you want to manage.
Select **Edit**, **Duplicate**, **Move**, or **Delete**.
You can manage templates from **My Templates**.
Select **My Templates** in the sidebar.
Click the **three-dot menu (⋯)** for the template you want to manage.
Select the action you want to take, such as editing, moving, duplicating, or deleting the template.
Updating a template does not update documents that were already created from it. The changes apply the next time someone uses the template.
## Practical template examples
Instead of turning every repeated document into a template, focus on documents where the structure matters. Here are useful examples to start from.
Good for recurring team meetings, 1:1s, client calls, or project check-ins.
**Suggested structure:**
* Date and attendees
* Agenda
* Decisions made
* Action items with owners
* Open questions
* Next meeting date
Good for status reports, team updates, or personal weekly reviews.
**Suggested structure:**
* Highlights from the week
* Completed work
* In-progress work
* Blockers or risks
* Priorities for next week
* Links to related documents
Good for starting projects with the same planning structure every time.
**Suggested structure:**
* Project goal
* Scope and non-goals
* Timeline and milestones
* Stakeholders
* Key documents and resources
* Success criteria
Good for routines you repeat, such as journaling, travel planning, meal planning, or habit tracking.
**Suggested structure:**
* Goal or intention
* Checklist
* Notes section
* Important dates
* Links, files, or references
* Reflection or follow-up section
## Related Articles
Use templates with daily notes for consistent journaling
Style your templates with backgrounds and covers
Understand content structure for building templates