> ## Documentation Index
> Fetch the complete documentation index at: https://craft-support.mintlify.site/llms.txt
> Use this file to discover all available pages before exploring further.
# Whiteboards
> Create infinite canvas whiteboards for visual thinking, diagramming, and freeform collaboration.
Whiteboards in Craft provide an infinite canvas for visual thinking. Use them to sketch ideas, create diagrams, plan projects, or collaborate visually with your team.
## What are whiteboards?
Whiteboards are freeform canvases embedded directly in your documents. Unlike structured text, whiteboards let you place elements anywhere, connect ideas with arrows, and think visually without constraints.
**Use whiteboards for:**
* Brainstorming and mind mapping
* Creating flowcharts and diagrams
* Planning projects with visual layouts
* Sketching wireframes and mockups
* Organizing ideas spatially
* Visual collaboration with team members
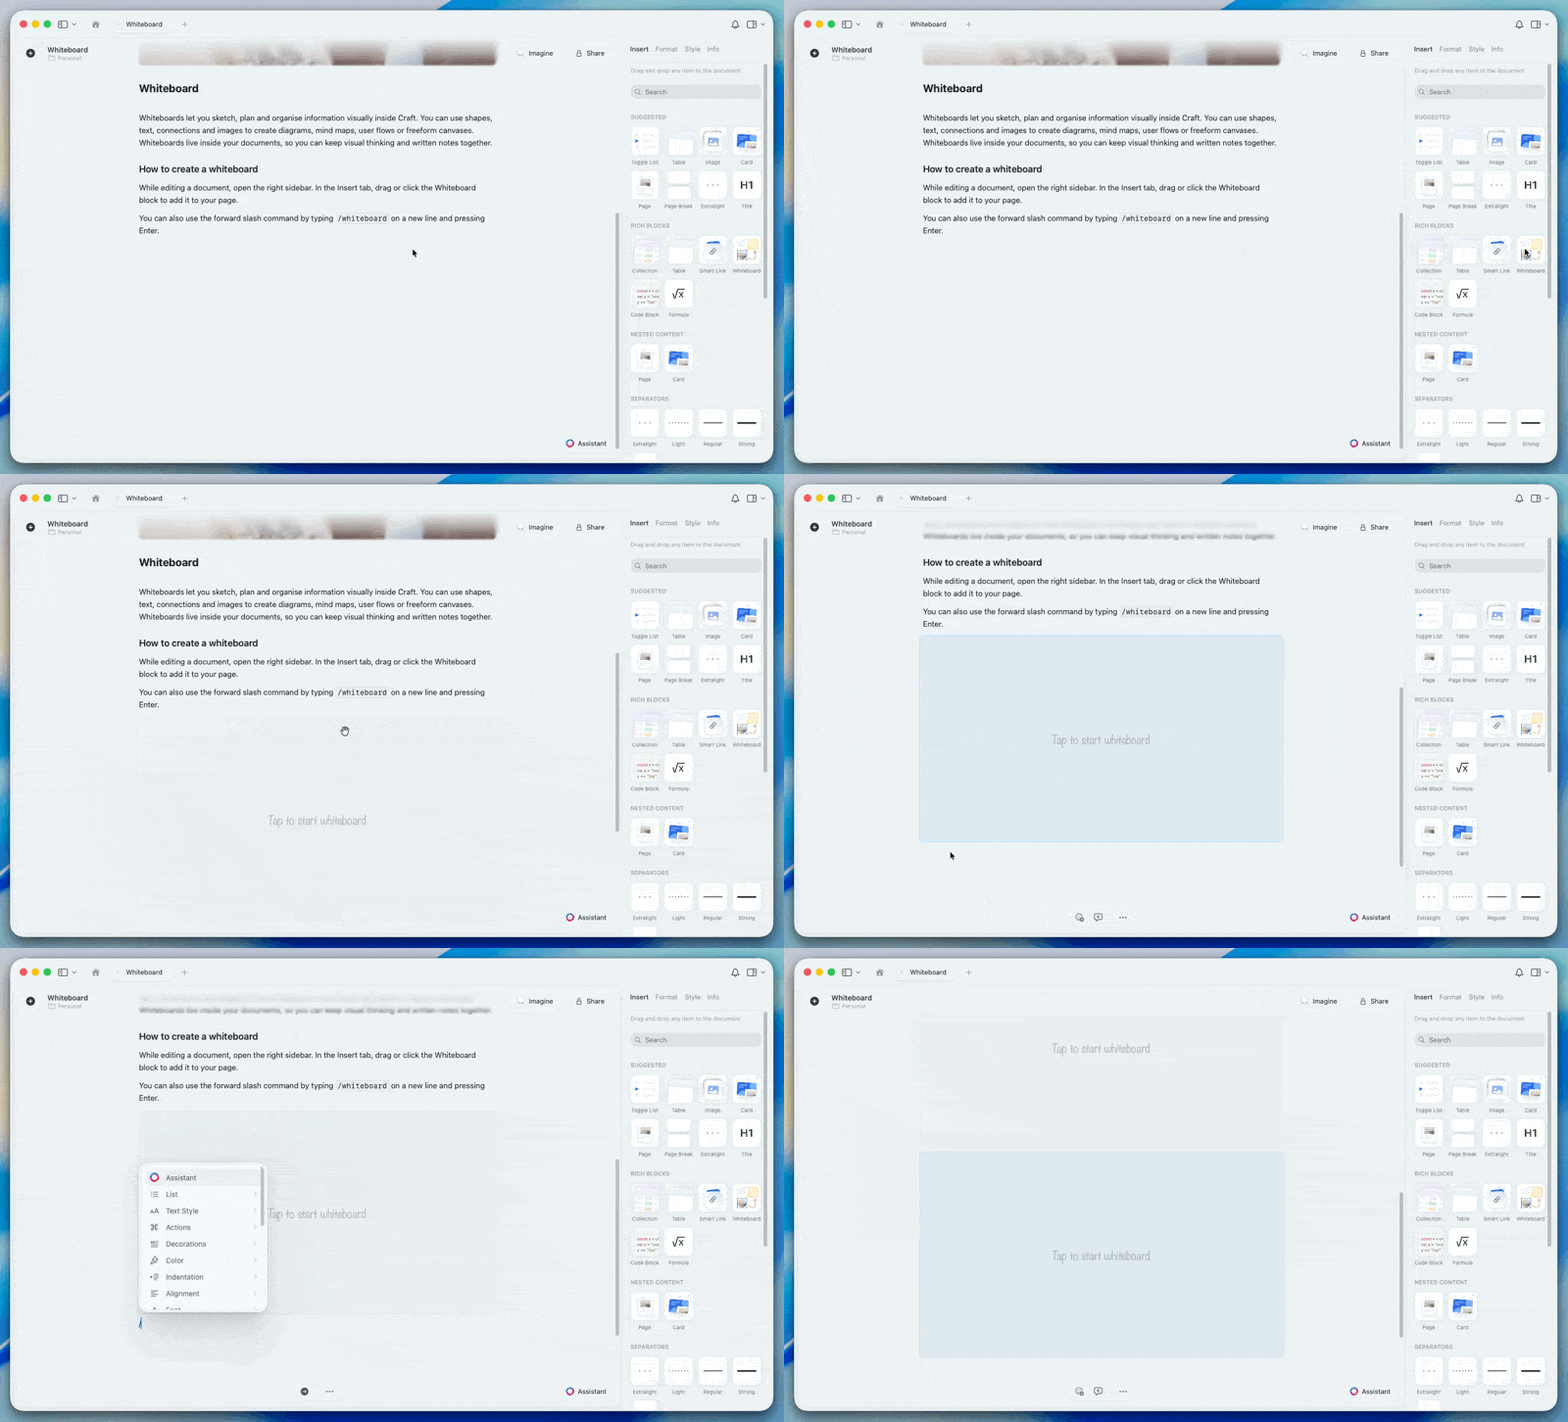
## Creating a whiteboard
In a document, position your cursor where you want the whiteboard
Type `/whiteboard` and press **Return**, or click **+** and select **Whiteboard**
A new whiteboard block appears. Click it to open the editing canvas
In a document, tap where you want the whiteboard
Tap the **+** button and select **Whiteboard**
Tap the whiteboard preview to open the editing canvas
In a document, position your cursor where you want the whiteboard
Type `/whiteboard` and press **Enter**, or click **+** and select **Whiteboard**
A new whiteboard block appears. Click it to open the editing canvas
In a document, position your cursor where you want the whiteboard
Type `/whiteboard` and press **Enter**, or click **+** and select **Whiteboard**
A new whiteboard block appears. Click it to open the editing canvas
The whiteboard opens in full screen, ready for you to start creating.
 ## Whiteboard tools
The toolbar provides everything you need to create visual content.
### Selection tool
Use the selection tool to move, resize, and modify existing elements.
* **Select elements**: Click to select one element, or drag to select multiple
* **Move**: Drag selected elements to reposition them
* **Resize**: Drag corner handles to change size
* **Delete**: Select and press **Delete** or **Backspace**
### Drawing tools
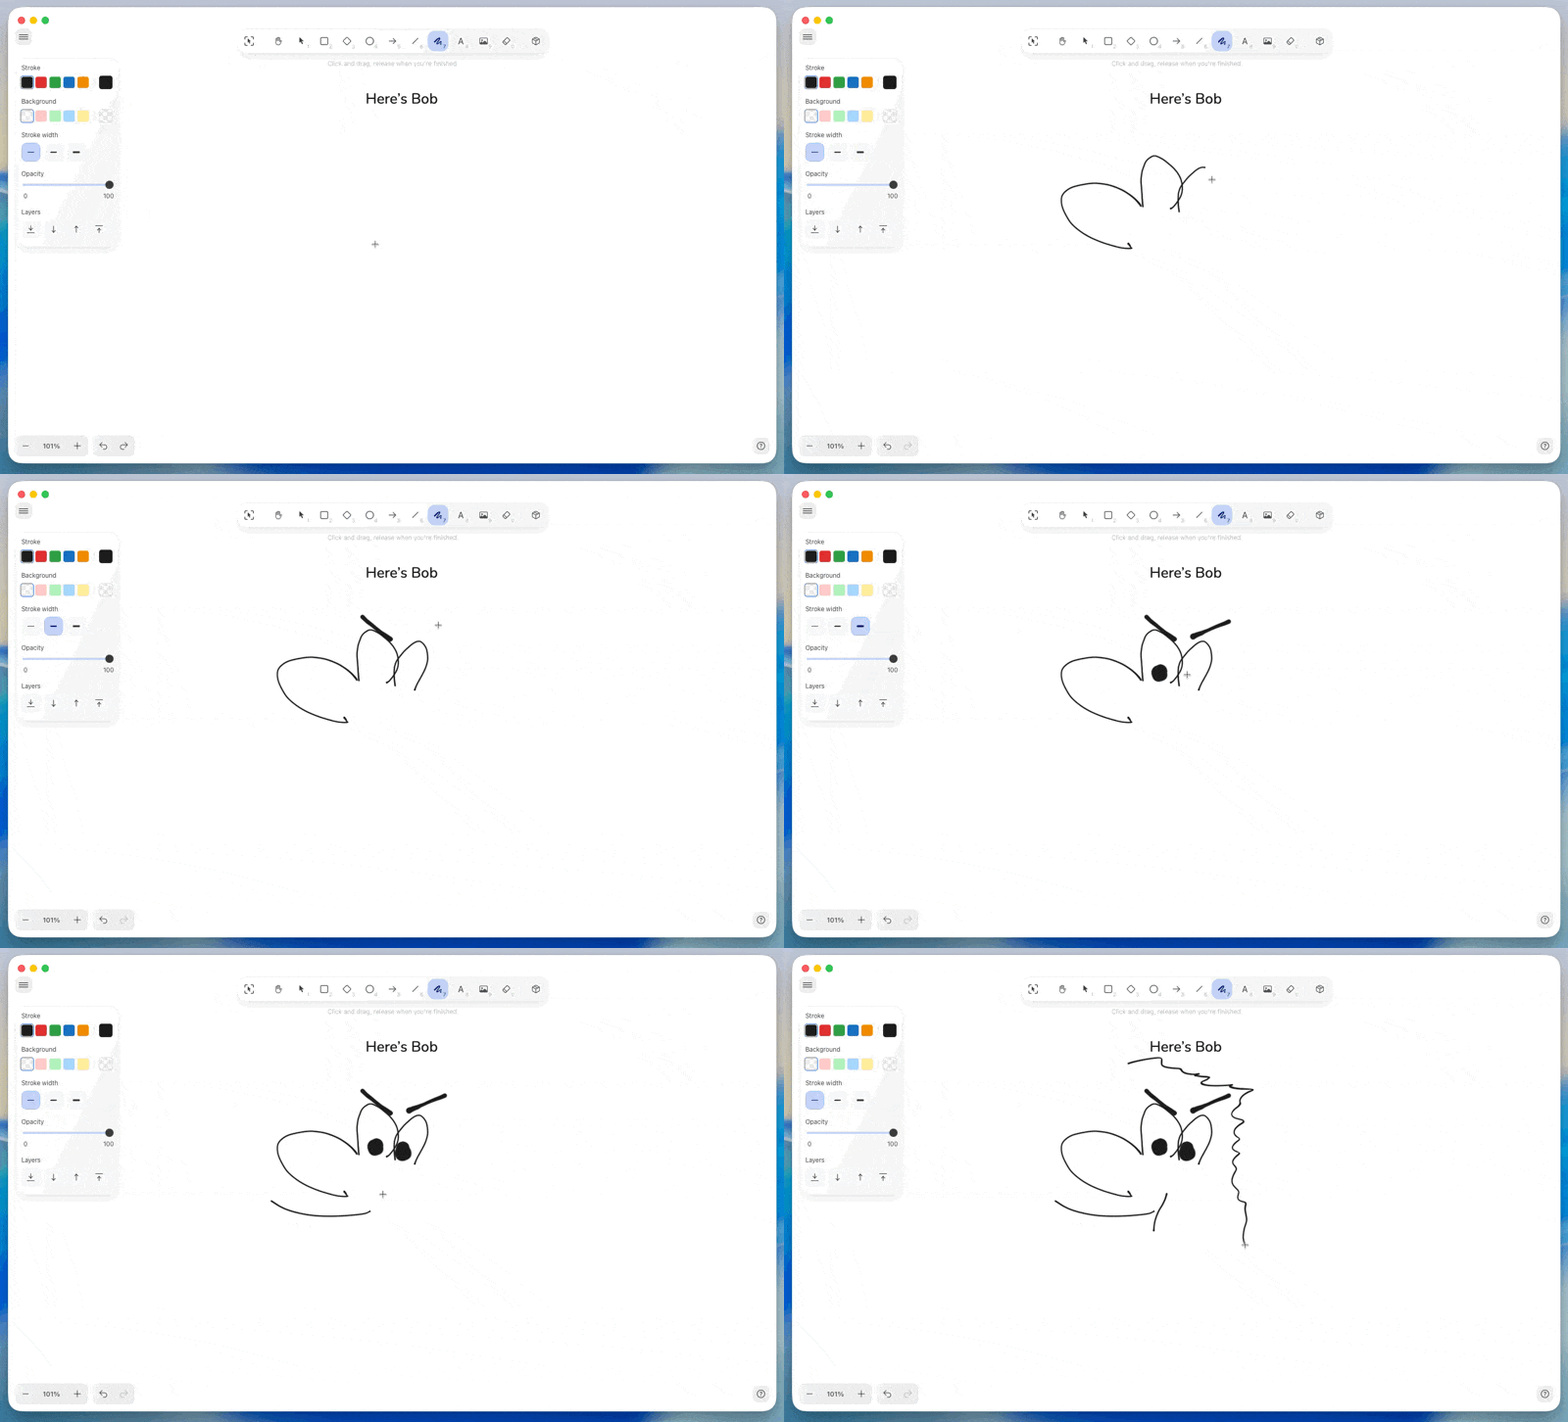
**Pencil**
Draw freeform strokes with the pencil tool. Perfect for sketching, handwriting, or creating organic shapes.
* Click the pencil icon or press **P**
* Adjust stroke width and color from the toolbar
* Draw naturally with mouse, trackpad, or stylus
## Whiteboard tools
The toolbar provides everything you need to create visual content.
### Selection tool
Use the selection tool to move, resize, and modify existing elements.
* **Select elements**: Click to select one element, or drag to select multiple
* **Move**: Drag selected elements to reposition them
* **Resize**: Drag corner handles to change size
* **Delete**: Select and press **Delete** or **Backspace**
### Drawing tools
**Pencil**
Draw freeform strokes with the pencil tool. Perfect for sketching, handwriting, or creating organic shapes.
* Click the pencil icon or press **P**
* Adjust stroke width and color from the toolbar
* Draw naturally with mouse, trackpad, or stylus
 **Arrow**
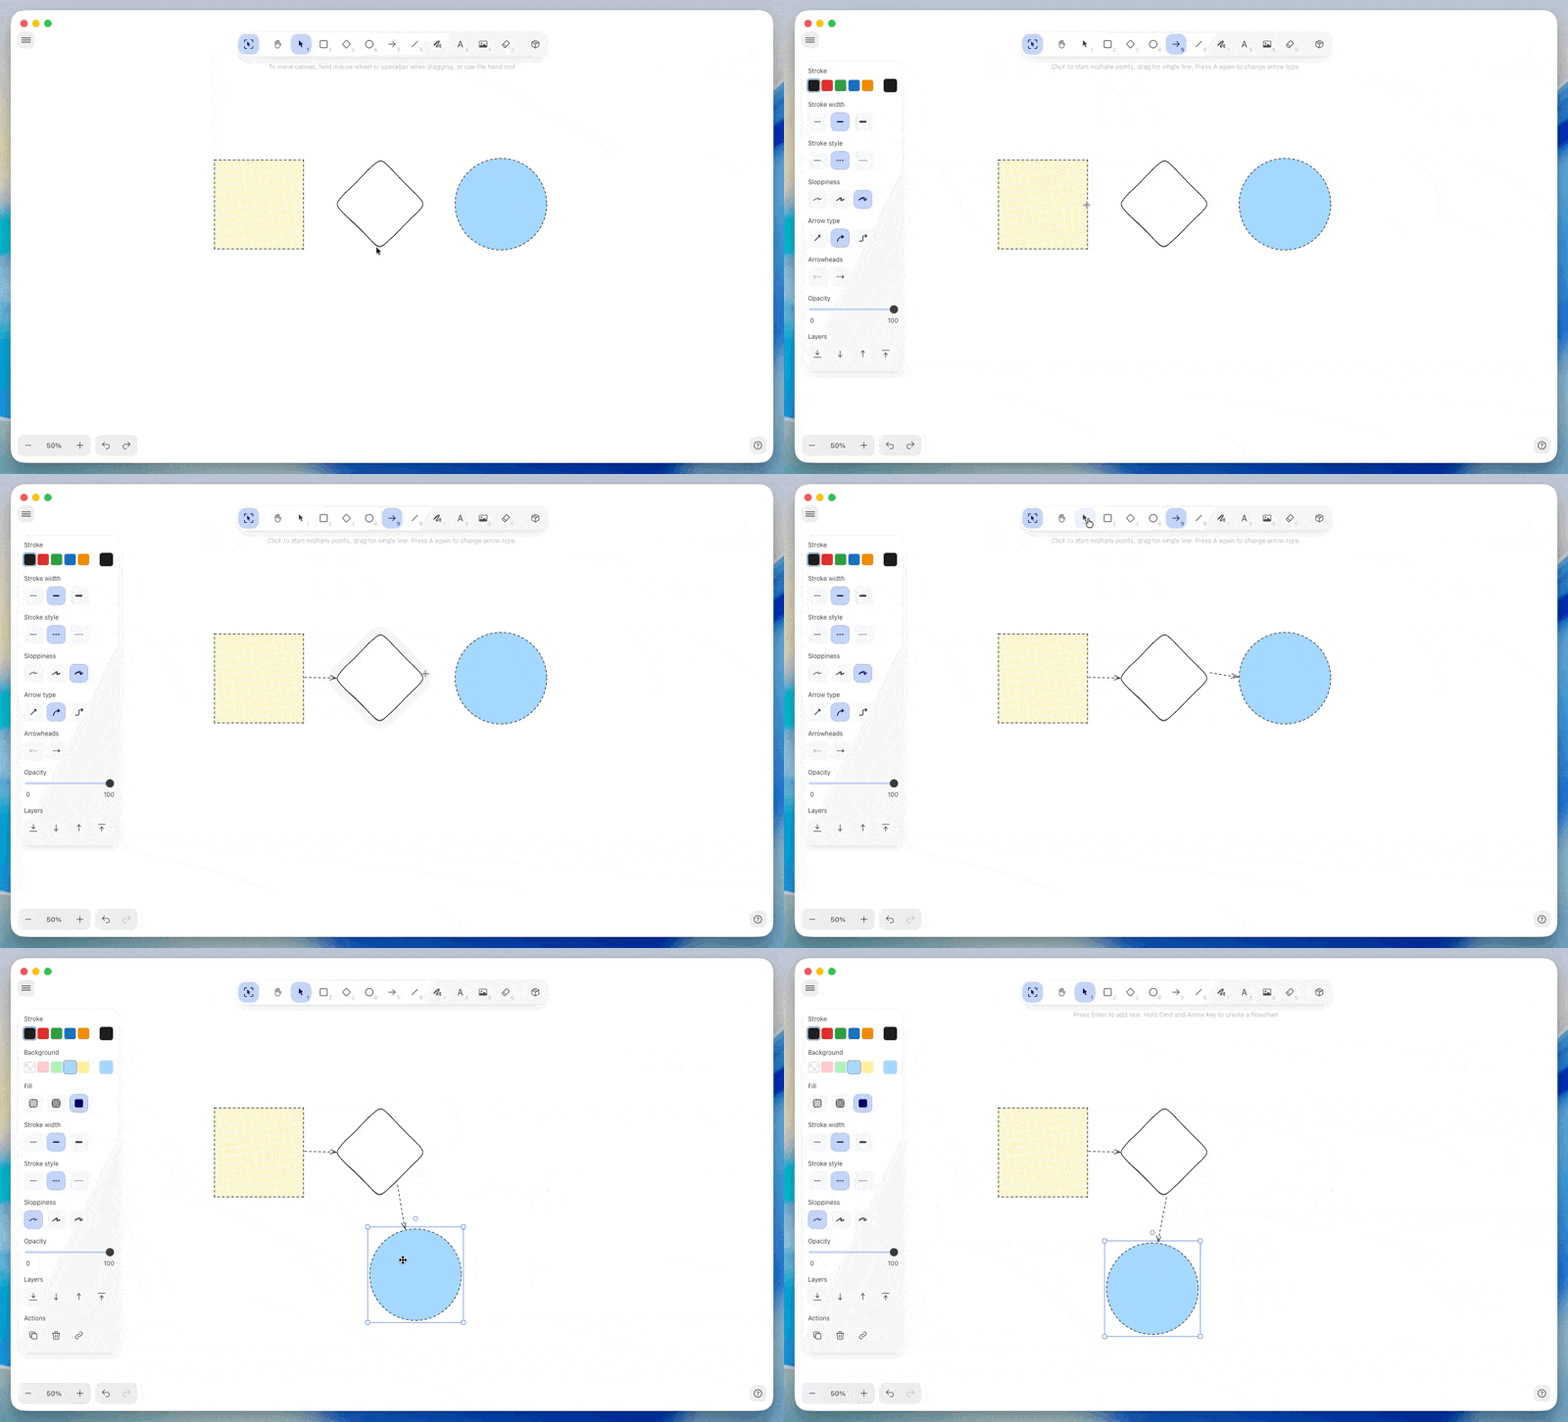
Connect elements with arrows to show relationships and flow.
* Click the arrow icon or press **A**
* Drag from start point to end point
* Customize arrowhead style for both ends
* Adjust line thickness and color
**Arrow**
Connect elements with arrows to show relationships and flow.
* Click the arrow icon or press **A**
* Drag from start point to end point
* Customize arrowhead style for both ends
* Adjust line thickness and color
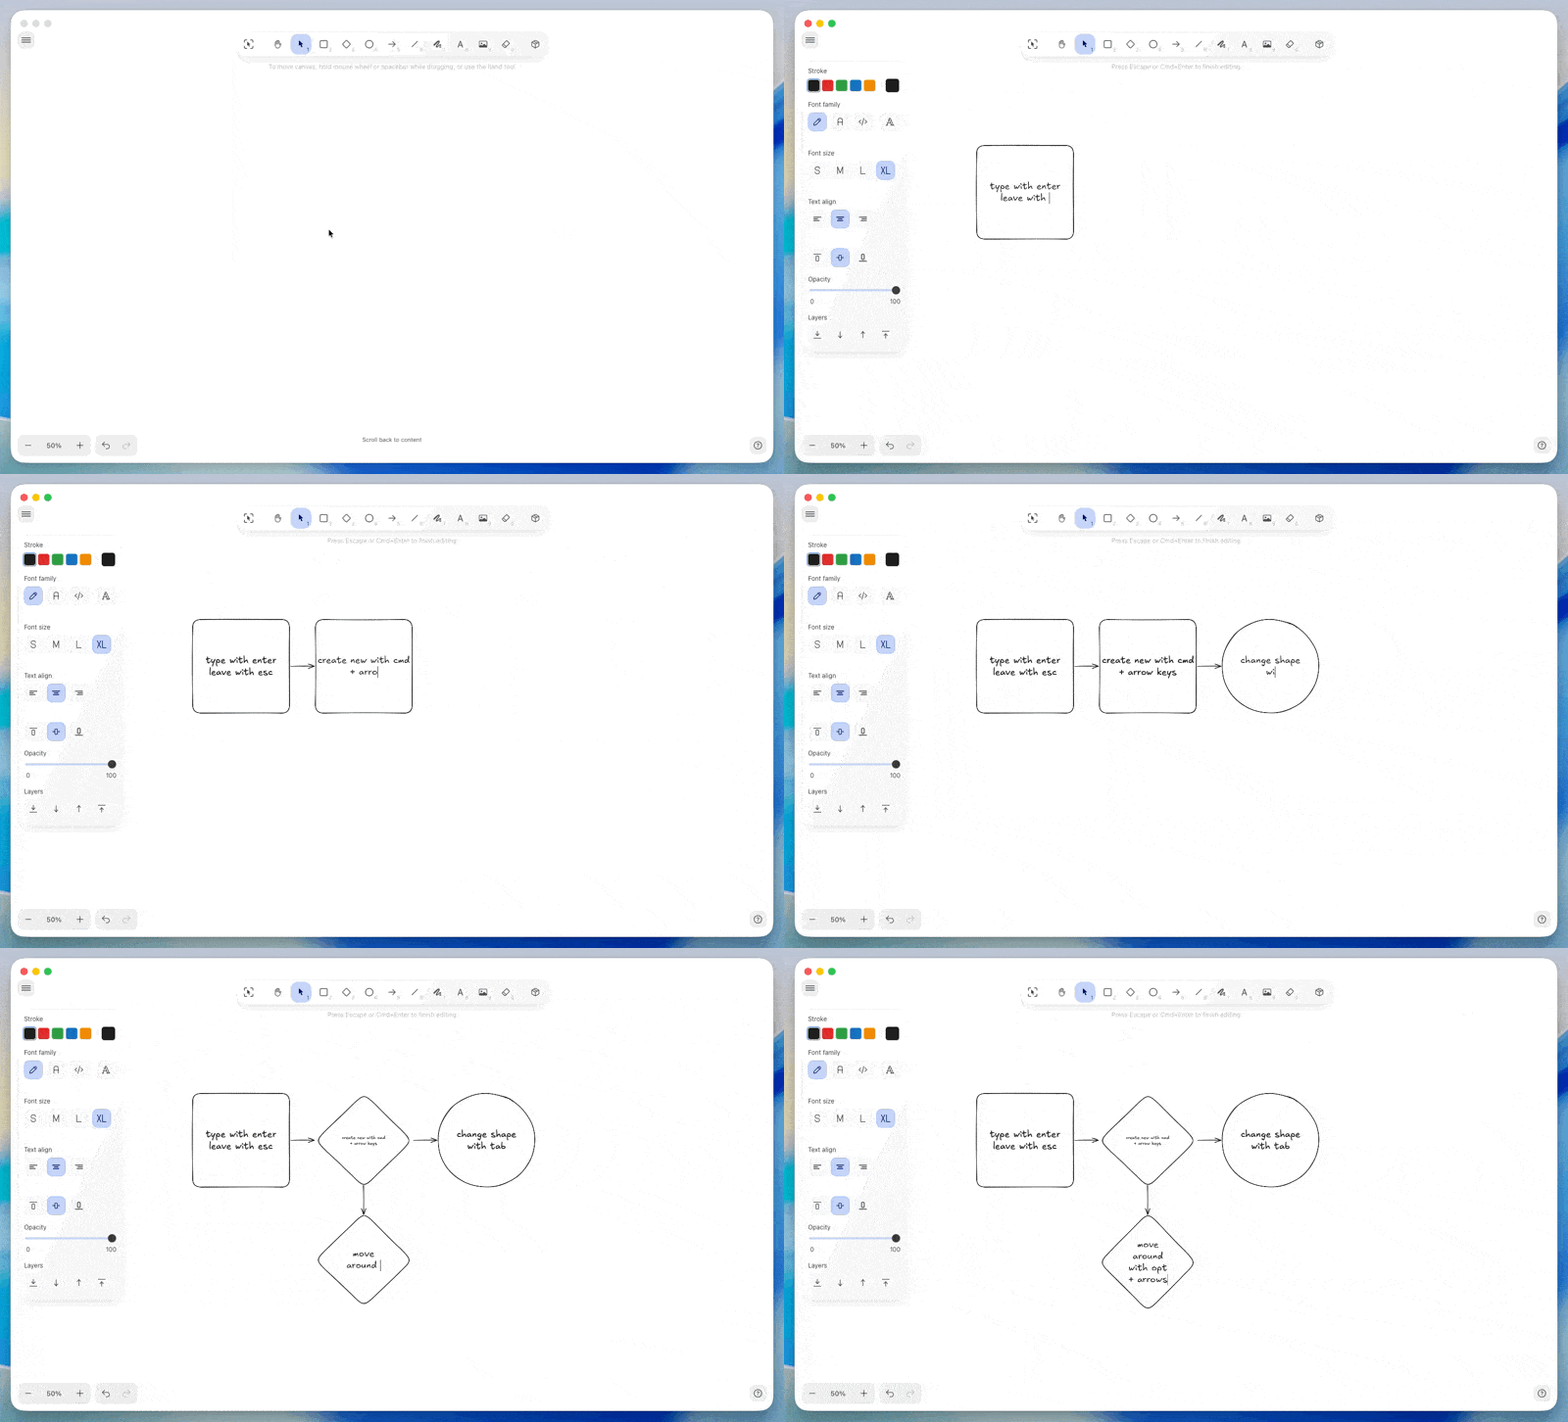
 ### Shape tools
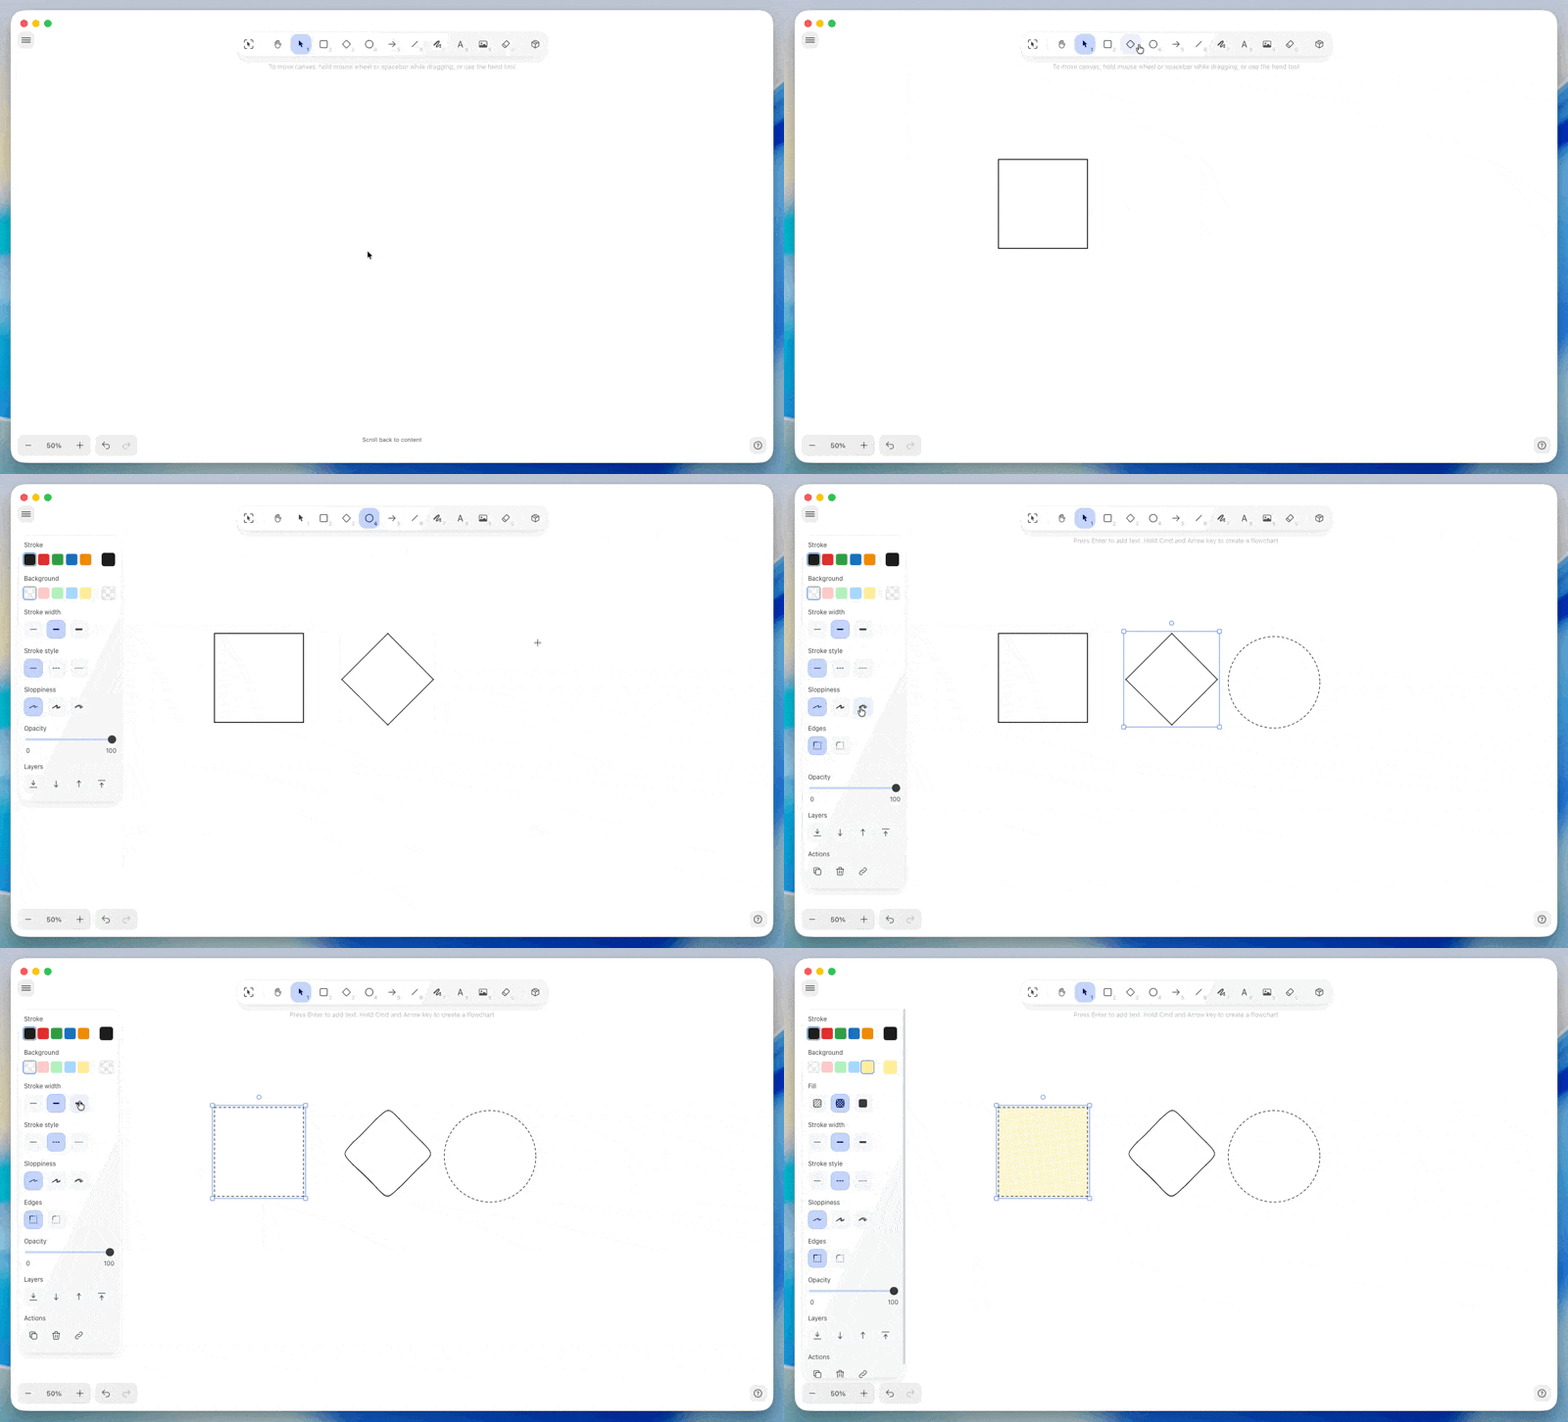
Add geometric shapes for diagrams and structured layouts.
* **Rectangle**: Click the shape icon and select rectangle
* **Diamond**: Click the shape icon and select diamond
* **Ellipse**: Click the shape icon and select ellipse
### Shape tools
Add geometric shapes for diagrams and structured layouts.
* **Rectangle**: Click the shape icon and select rectangle
* **Diamond**: Click the shape icon and select diamond
* **Ellipse**: Click the shape icon and select ellipse
 **Customizing shapes:**
* Fill color and opacity
* Stroke color and width
* Text inside shapes (double-click to add)
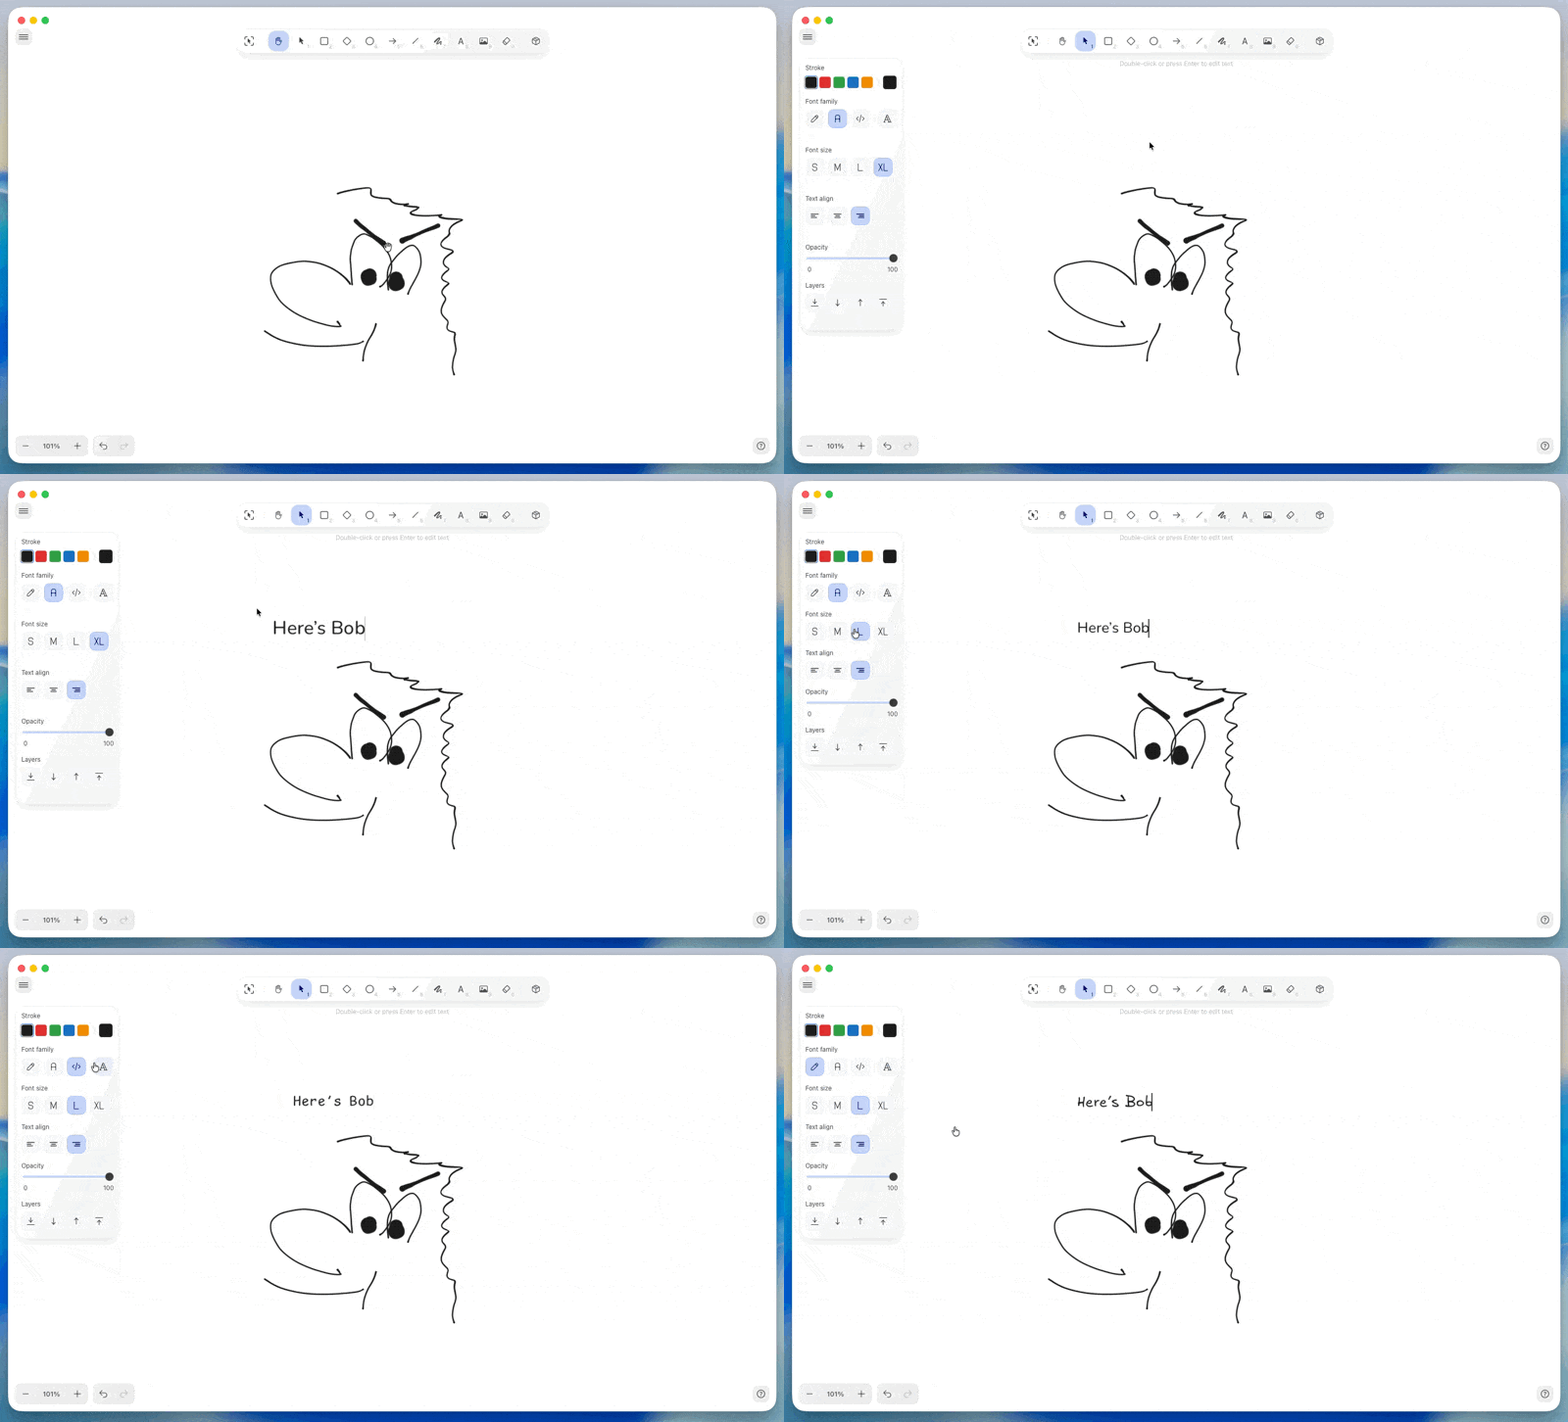
### Text and sticky notes
**Text**
Add standalone text labels anywhere on the canvas.
* Click the text icon or press **T**
* Click where you want text to appear
* Type your content
* Format with font, size, and color options
**Customizing shapes:**
* Fill color and opacity
* Stroke color and width
* Text inside shapes (double-click to add)
### Text and sticky notes
**Text**
Add standalone text labels anywhere on the canvas.
* Click the text icon or press **T**
* Click where you want text to appear
* Type your content
* Format with font, size, and color options
 **Sticky notes**
Create note-style elements for ideas and comments.
* Click the sticky note icon
* Click where you want the note
* Type your content
* Choose background color
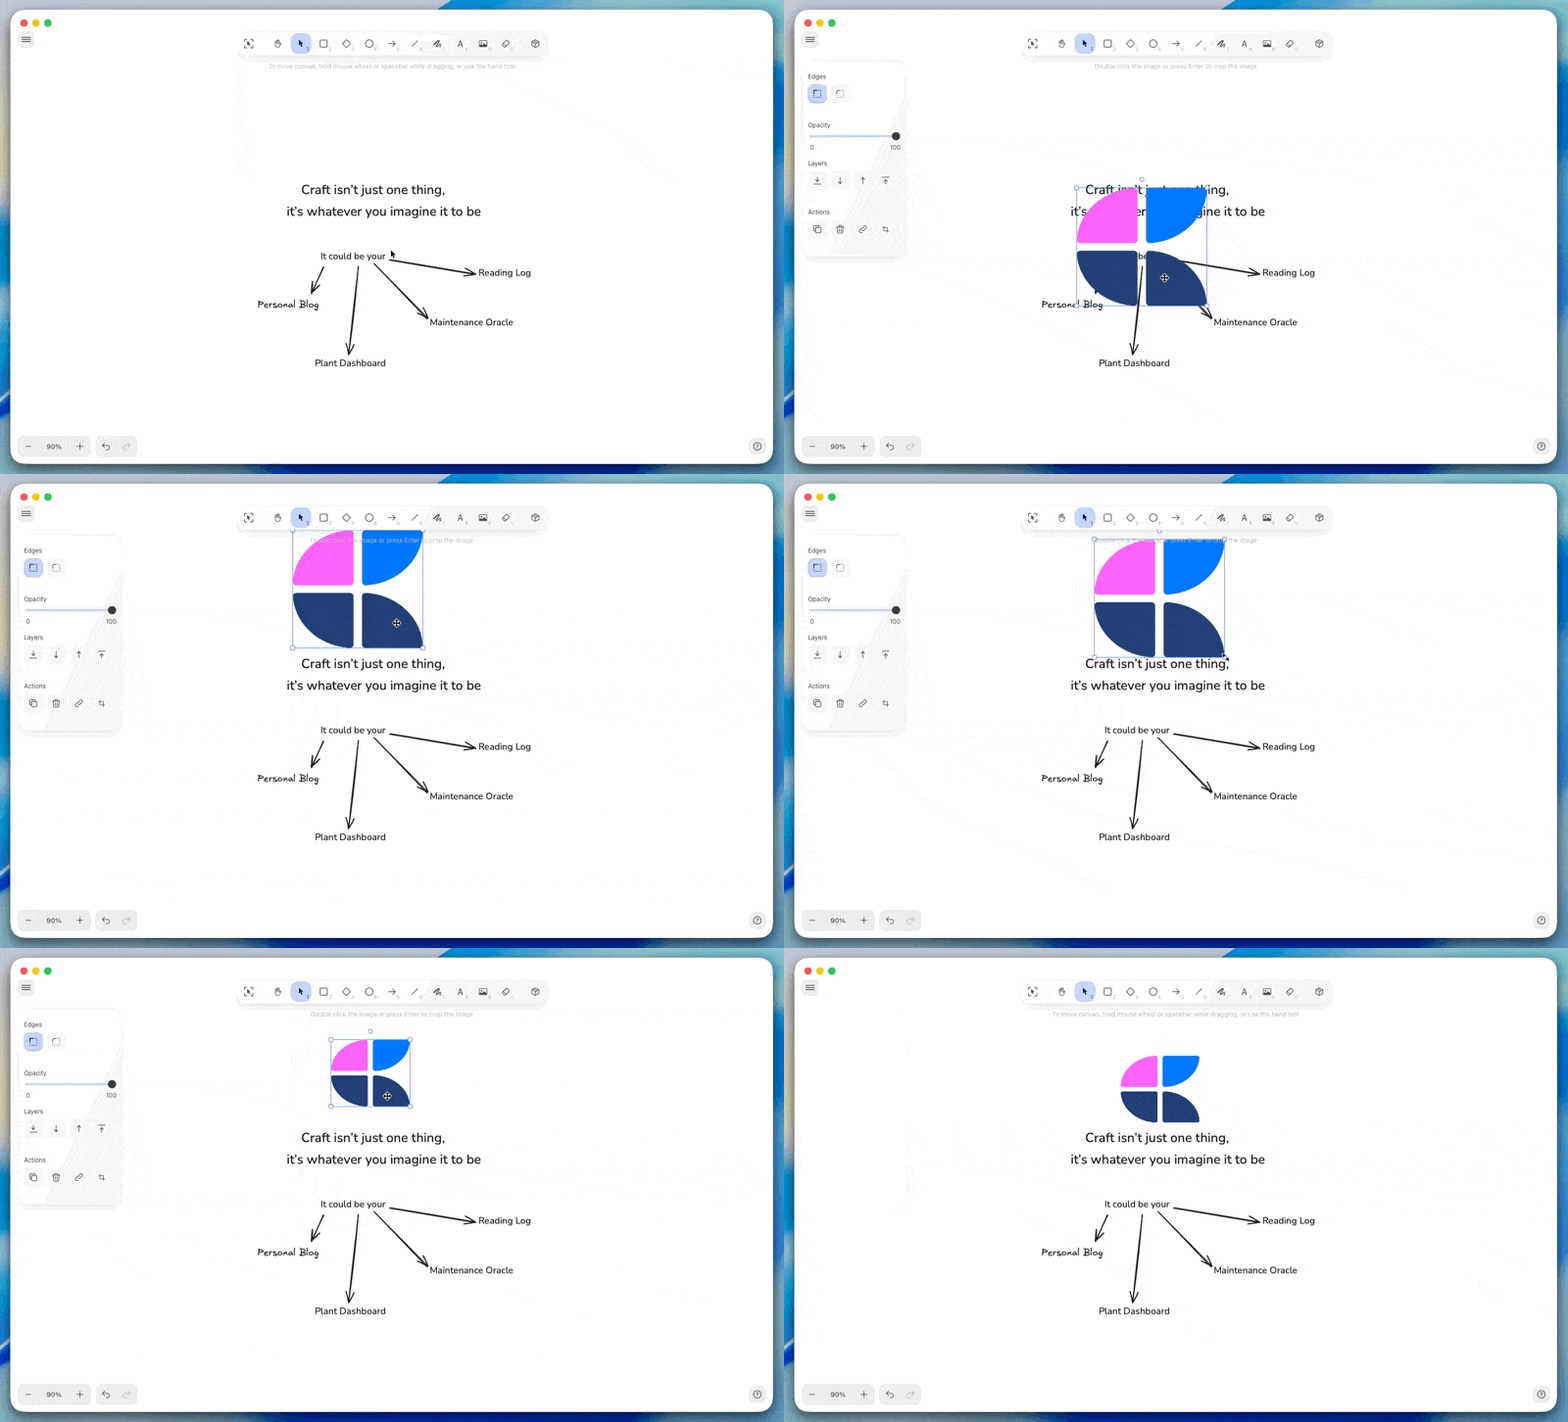
### Images and media
Add visual assets directly to your whiteboard.
Click the image icon in the toolbar
Select an image file from your device
The image appears on the canvas, ready to position and resize
**Limits**: Up to 50 images and 10 videos per whiteboard, 100MB maximum per file.
Tap the image icon in the toolbar
Choose from Photos or Files
The image appears on the canvas, ready to position and resize
**Limits**: Up to 50 images and 10 videos per whiteboard, 100MB maximum per file.
Click the image icon in the toolbar
Select an image file from your device
The image appears on the canvas, ready to position and resize
**Limits**: Up to 50 images and 10 videos per whiteboard, 100MB maximum per file.
Click the image icon in the toolbar
Select an image file from your device
The image appears on the canvas, ready to position and resize
**Limits**: Up to 50 images and 10 videos per whiteboard, 100MB maximum per file.
**Sticky notes**
Create note-style elements for ideas and comments.
* Click the sticky note icon
* Click where you want the note
* Type your content
* Choose background color
### Images and media
Add visual assets directly to your whiteboard.
Click the image icon in the toolbar
Select an image file from your device
The image appears on the canvas, ready to position and resize
**Limits**: Up to 50 images and 10 videos per whiteboard, 100MB maximum per file.
Tap the image icon in the toolbar
Choose from Photos or Files
The image appears on the canvas, ready to position and resize
**Limits**: Up to 50 images and 10 videos per whiteboard, 100MB maximum per file.
Click the image icon in the toolbar
Select an image file from your device
The image appears on the canvas, ready to position and resize
**Limits**: Up to 50 images and 10 videos per whiteboard, 100MB maximum per file.
Click the image icon in the toolbar
Select an image file from your device
The image appears on the canvas, ready to position and resize
**Limits**: Up to 50 images and 10 videos per whiteboard, 100MB maximum per file.
 ## Navigation and view
### Zoom and pan
Move around your whiteboard and adjust the view level.
* **Pan**: Drag with two fingers (trackpad) or hold **Space** and drag (mouse)
* **Zoom in**: Pinch out (trackpad), **Cmd/Ctrl** + **+**, or use zoom controls
* **Zoom out**: Pinch in (trackpad), **Cmd/Ctrl** + **-**, or use zoom controls
* **Fit to view**: Click the zoom reset button to see all content
### Background customization
Customize the whiteboard background to match your workflow.
**Grid options:**
* **Dots**: Subtle alignment reference
* **Lines**: Traditional grid lines
* **Squares**: Graph paper style
* **None**: Clean, blank canvas
**Background color:**
Choose any color for your canvas background. The background color is visible both while editing and in the document preview.
Access background settings by clicking the background icon in the toolbar. Choose your preferred grid style and color.
Tap the background icon in the toolbar to access grid and color settings.
Click the background icon in the toolbar to choose grid style and background color.
Click the background icon in the toolbar to choose grid style and background color.
## Editing whiteboards
### Arranging elements
Control how elements overlap and relate to each other.
**Layer order:**
* **Bring forward**: Right-click → **Arrange** → **Bring Forward**
* **Send backward**: Right-click → **Arrange** → **Send Backward**
* **Bring to front**: Right-click → **Arrange** → **Bring to Front**
* **Send to back**: Right-click → **Arrange** → **Send to Back**
**Grouping elements:**
Select multiple elements and right-click → **Group** to move them together as one unit. Ungroup when you need to edit individual elements again.
### Copying and duplicating
* **Duplicate**: Select and press **Cmd/Ctrl** + **D**
* **Copy/Paste**: Use standard shortcuts **Cmd/Ctrl** + **C** and **Cmd/Ctrl** + **V**
* **Cut**: **Cmd/Ctrl** + **X** to remove and place on clipboard
## Navigation and view
### Zoom and pan
Move around your whiteboard and adjust the view level.
* **Pan**: Drag with two fingers (trackpad) or hold **Space** and drag (mouse)
* **Zoom in**: Pinch out (trackpad), **Cmd/Ctrl** + **+**, or use zoom controls
* **Zoom out**: Pinch in (trackpad), **Cmd/Ctrl** + **-**, or use zoom controls
* **Fit to view**: Click the zoom reset button to see all content
### Background customization
Customize the whiteboard background to match your workflow.
**Grid options:**
* **Dots**: Subtle alignment reference
* **Lines**: Traditional grid lines
* **Squares**: Graph paper style
* **None**: Clean, blank canvas
**Background color:**
Choose any color for your canvas background. The background color is visible both while editing and in the document preview.
Access background settings by clicking the background icon in the toolbar. Choose your preferred grid style and color.
Tap the background icon in the toolbar to access grid and color settings.
Click the background icon in the toolbar to choose grid style and background color.
Click the background icon in the toolbar to choose grid style and background color.
## Editing whiteboards
### Arranging elements
Control how elements overlap and relate to each other.
**Layer order:**
* **Bring forward**: Right-click → **Arrange** → **Bring Forward**
* **Send backward**: Right-click → **Arrange** → **Send Backward**
* **Bring to front**: Right-click → **Arrange** → **Bring to Front**
* **Send to back**: Right-click → **Arrange** → **Send to Back**
**Grouping elements:**
Select multiple elements and right-click → **Group** to move them together as one unit. Ungroup when you need to edit individual elements again.
### Copying and duplicating
* **Duplicate**: Select and press **Cmd/Ctrl** + **D**
* **Copy/Paste**: Use standard shortcuts **Cmd/Ctrl** + **C** and **Cmd/Ctrl** + **V**
* **Cut**: **Cmd/Ctrl** + **X** to remove and place on clipboard
 ### Exporting content
Export your whiteboard as an image for use outside of Craft.
The macOS app doesn't have an Export menu for whiteboards. Select the whiteboard and press **Shift + Option + C** to copy it to the clipboard as a PNG, then paste it where you need it. To save a PNG or SVG file, open the same document in Craft for web and use **Export image**.
Direct export isn't available in the iPhone and iPad apps. As a workaround, take a screenshot, or open the document in Craft for web and use **Export image** to save a PNG or SVG.
Open the whiteboard, click the menu (≡) at the top-left, then choose **Export image** (or press **Cmd + Shift + E**). Pick **PNG** or **SVG** to download a file, or **Copy to clipboard**. You can toggle the background, dark mode, and embed scene, and set the scale (1x, 2x, or 3x).
Open the whiteboard, click the menu (≡) at the top-left, then choose **Export image** (or press **Ctrl + Shift + E**). Pick **PNG** or **SVG** to download a file, or **Copy to clipboard**. You can toggle the background, dark mode, and embed scene, and set the scale (1x, 2x, or 3x).
## Collaboration
Whiteboards support real-time collaboration just like documents.
When multiple people work on the same whiteboard:
* **See cursors**: Each person's cursor appears with their name
* **Live updates**: Changes appear instantly for everyone
* **No conflicts**: The whiteboard merges edits automatically
Whiteboard access follows document permissions. Anyone with edit access to the document can edit the whiteboard. Viewers can see the whiteboard but cannot modify it.
## Whiteboard previews
In your document, whiteboards display as preview blocks showing a snapshot of the canvas.
**Preview updates:**
* Automatically after you close the whiteboard
* Shows the current state of your whiteboard
* Adapts to light/dark mode in your document
The preview is a visual reference – click it to open and edit the full whiteboard.
## Tips and best practices
**Start simple**
Begin with basic shapes and text. Add complexity as your idea develops.
**Use color meaningfully**
Assign colors to categories or themes. Consistent color coding makes complex diagrams easier to understand.
**Leverage arrows**
Show relationships, flow, and dependencies with arrows. Customize arrowhead styles to indicate different connection types.
**Combine with documents**
Whiteboards work best alongside text. Use whiteboards for visual thinking, then document conclusions in structured text.
**Template-ready**
Create reusable layouts (Kanban boards, flowchart structures, etc.) and duplicate them for new projects.
## Troubleshooting
This section explains how to update legacy whiteboards created with the previous whiteboard framework. These older whiteboards cannot be opened directly in the new version of the Craft application.
### When an update is required
If a document contains a legacy whiteboard, you will see an **Update Needed** label on the board preview. The whiteboard block remains visible and can still be duplicated or moved, but it cannot be opened until it is updated.
### Starting the update
When you attempt to open a legacy whiteboard, you'll see a migration dialog. Select **Create new version** to continue. A new whiteboard will be generated directly below the original block.
### What happens during migration
The migration copies all items from the legacy board into the new framework. The original whiteboard block remains untouched. The migration can be repeated if needed.
**Current limitations:**
* Only the original version of a whiteboard will migrate. Duplicates of legacy whiteboards do not migrate
* In some layouts with complex layering, text can temporarily appear behind shapes. This can be corrected by adjusting the layer order in the new board
### After migration
Once the new version is created, you can open and edit it normally. If the result is not what you expected, you can run the migration again or manually adjust the content. The legacy block will remain in place as a reference until you choose to delete it.
Migration is intended to preserve content as accurately as possible. If you notice any issues that cannot be resolved by reordering layers or repeating the migration, please contact support for assistance.
Very large whiteboards with hundreds of elements may experience slower rendering.
**To improve performance:**
* Split complex boards into focused sections
* Use separate whiteboards for different topics
* Limit the number of high-resolution images
* Close other tabs and applications while working
If the whiteboard preview in your document doesn't reflect recent changes:
Open the whiteboard
Make any small change (move an element)
Close the whiteboard
This triggers a new preview generation. The preview typically updates within a few seconds.
For general troubleshooting, sync, or platform-specific issues, see the [Troubleshooting Guide](/docs/introduction/troubleshooting).
### Exporting content
Export your whiteboard as an image for use outside of Craft.
The macOS app doesn't have an Export menu for whiteboards. Select the whiteboard and press **Shift + Option + C** to copy it to the clipboard as a PNG, then paste it where you need it. To save a PNG or SVG file, open the same document in Craft for web and use **Export image**.
Direct export isn't available in the iPhone and iPad apps. As a workaround, take a screenshot, or open the document in Craft for web and use **Export image** to save a PNG or SVG.
Open the whiteboard, click the menu (≡) at the top-left, then choose **Export image** (or press **Cmd + Shift + E**). Pick **PNG** or **SVG** to download a file, or **Copy to clipboard**. You can toggle the background, dark mode, and embed scene, and set the scale (1x, 2x, or 3x).
Open the whiteboard, click the menu (≡) at the top-left, then choose **Export image** (or press **Ctrl + Shift + E**). Pick **PNG** or **SVG** to download a file, or **Copy to clipboard**. You can toggle the background, dark mode, and embed scene, and set the scale (1x, 2x, or 3x).
## Collaboration
Whiteboards support real-time collaboration just like documents.
When multiple people work on the same whiteboard:
* **See cursors**: Each person's cursor appears with their name
* **Live updates**: Changes appear instantly for everyone
* **No conflicts**: The whiteboard merges edits automatically
Whiteboard access follows document permissions. Anyone with edit access to the document can edit the whiteboard. Viewers can see the whiteboard but cannot modify it.
## Whiteboard previews
In your document, whiteboards display as preview blocks showing a snapshot of the canvas.
**Preview updates:**
* Automatically after you close the whiteboard
* Shows the current state of your whiteboard
* Adapts to light/dark mode in your document
The preview is a visual reference – click it to open and edit the full whiteboard.
## Tips and best practices
**Start simple**
Begin with basic shapes and text. Add complexity as your idea develops.
**Use color meaningfully**
Assign colors to categories or themes. Consistent color coding makes complex diagrams easier to understand.
**Leverage arrows**
Show relationships, flow, and dependencies with arrows. Customize arrowhead styles to indicate different connection types.
**Combine with documents**
Whiteboards work best alongside text. Use whiteboards for visual thinking, then document conclusions in structured text.
**Template-ready**
Create reusable layouts (Kanban boards, flowchart structures, etc.) and duplicate them for new projects.
## Troubleshooting
This section explains how to update legacy whiteboards created with the previous whiteboard framework. These older whiteboards cannot be opened directly in the new version of the Craft application.
### When an update is required
If a document contains a legacy whiteboard, you will see an **Update Needed** label on the board preview. The whiteboard block remains visible and can still be duplicated or moved, but it cannot be opened until it is updated.
### Starting the update
When you attempt to open a legacy whiteboard, you'll see a migration dialog. Select **Create new version** to continue. A new whiteboard will be generated directly below the original block.
### What happens during migration
The migration copies all items from the legacy board into the new framework. The original whiteboard block remains untouched. The migration can be repeated if needed.
**Current limitations:**
* Only the original version of a whiteboard will migrate. Duplicates of legacy whiteboards do not migrate
* In some layouts with complex layering, text can temporarily appear behind shapes. This can be corrected by adjusting the layer order in the new board
### After migration
Once the new version is created, you can open and edit it normally. If the result is not what you expected, you can run the migration again or manually adjust the content. The legacy block will remain in place as a reference until you choose to delete it.
Migration is intended to preserve content as accurately as possible. If you notice any issues that cannot be resolved by reordering layers or repeating the migration, please contact support for assistance.
Very large whiteboards with hundreds of elements may experience slower rendering.
**To improve performance:**
* Split complex boards into focused sections
* Use separate whiteboards for different topics
* Limit the number of high-resolution images
* Close other tabs and applications while working
If the whiteboard preview in your document doesn't reflect recent changes:
Open the whiteboard
Make any small change (move an element)
Close the whiteboard
This triggers a new preview generation. The preview typically updates within a few seconds.
For general troubleshooting, sync, or platform-specific issues, see the [Troubleshooting Guide](/docs/introduction/troubleshooting).