What are custom prompts?
Custom prompts are reusable instructions you create for recurring tasks. Common uses include:- Rewriting text in a preferred tone
- Structuring notes or documentation
- Translating content to a target language
- Summarizing in a fixed format
- Generating task lists or plans
- Creating consistent captions and alt text
Accessing custom prompts
- Mac
- Web / Windows
- iOS
- Android
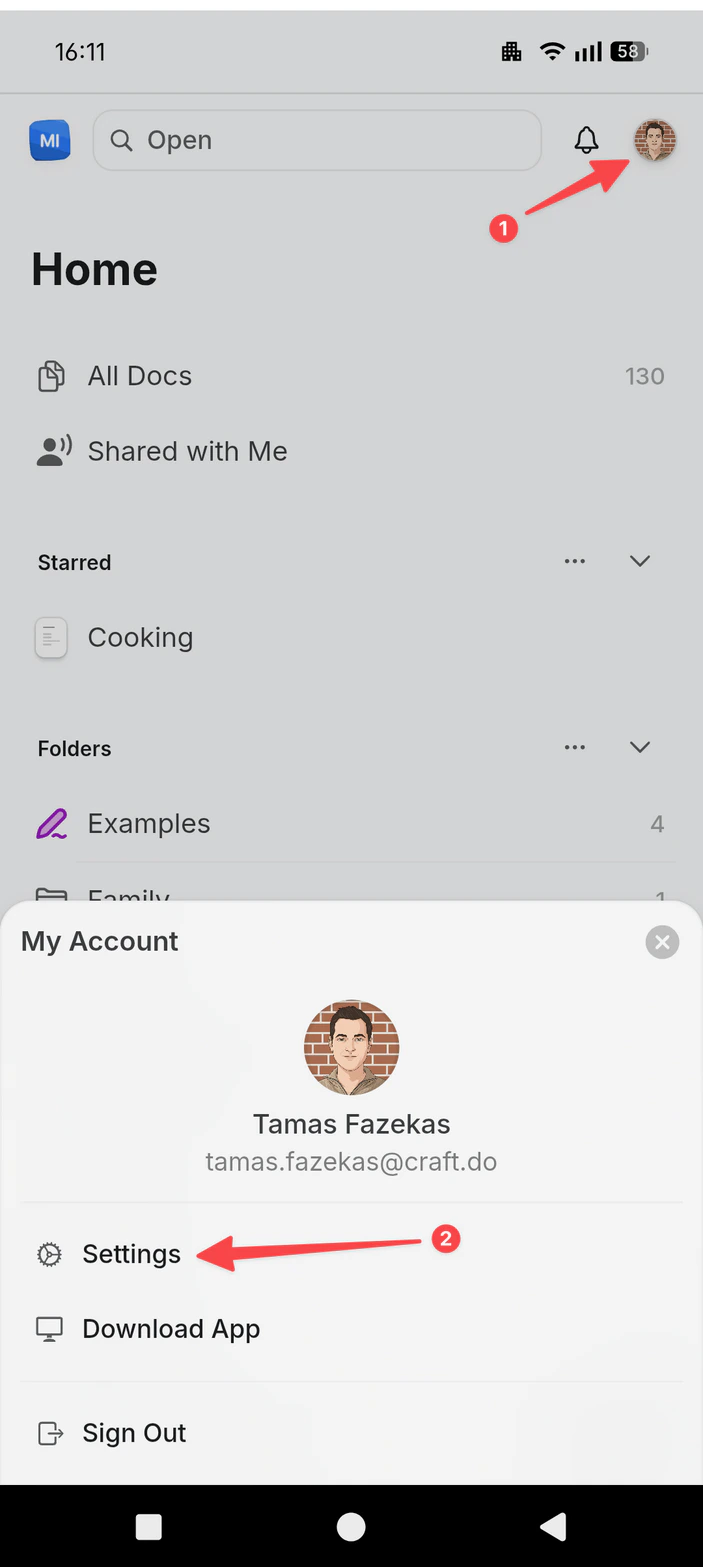
Click the Space name at the top of the sidebar to open Settings.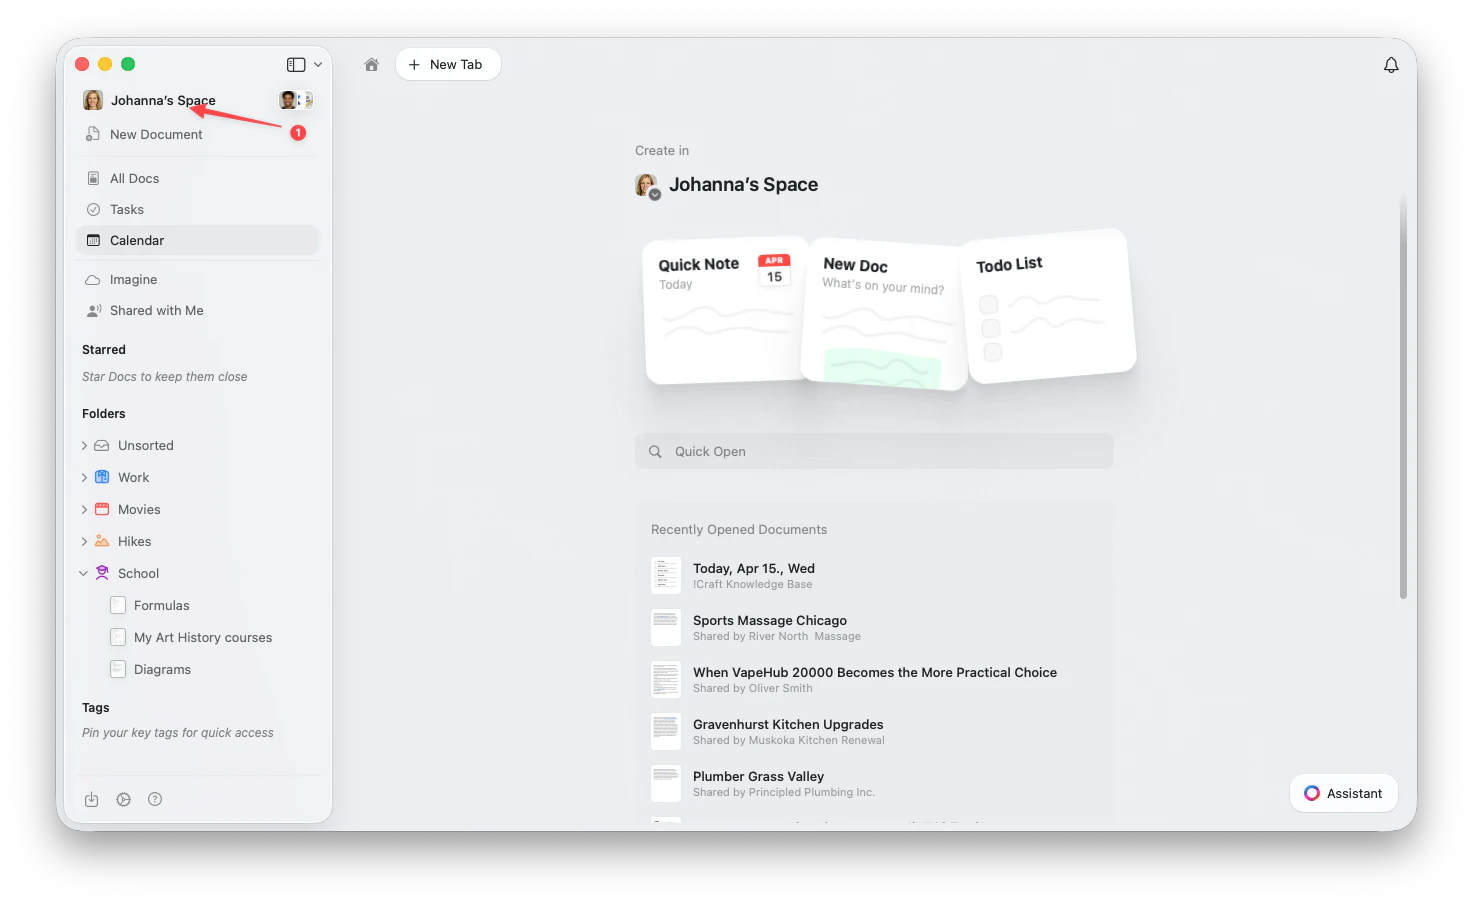

Creating effective prompts
The best prompts are specific and format-aware.- ✓ “Summarize this in 3 bullet points focused on action items”
- ✗ “Summarize this”
- ✓ “Rewrite in a friendly tone for a blog intro”
- ✗ “Make this better”
Example prompts
Limits
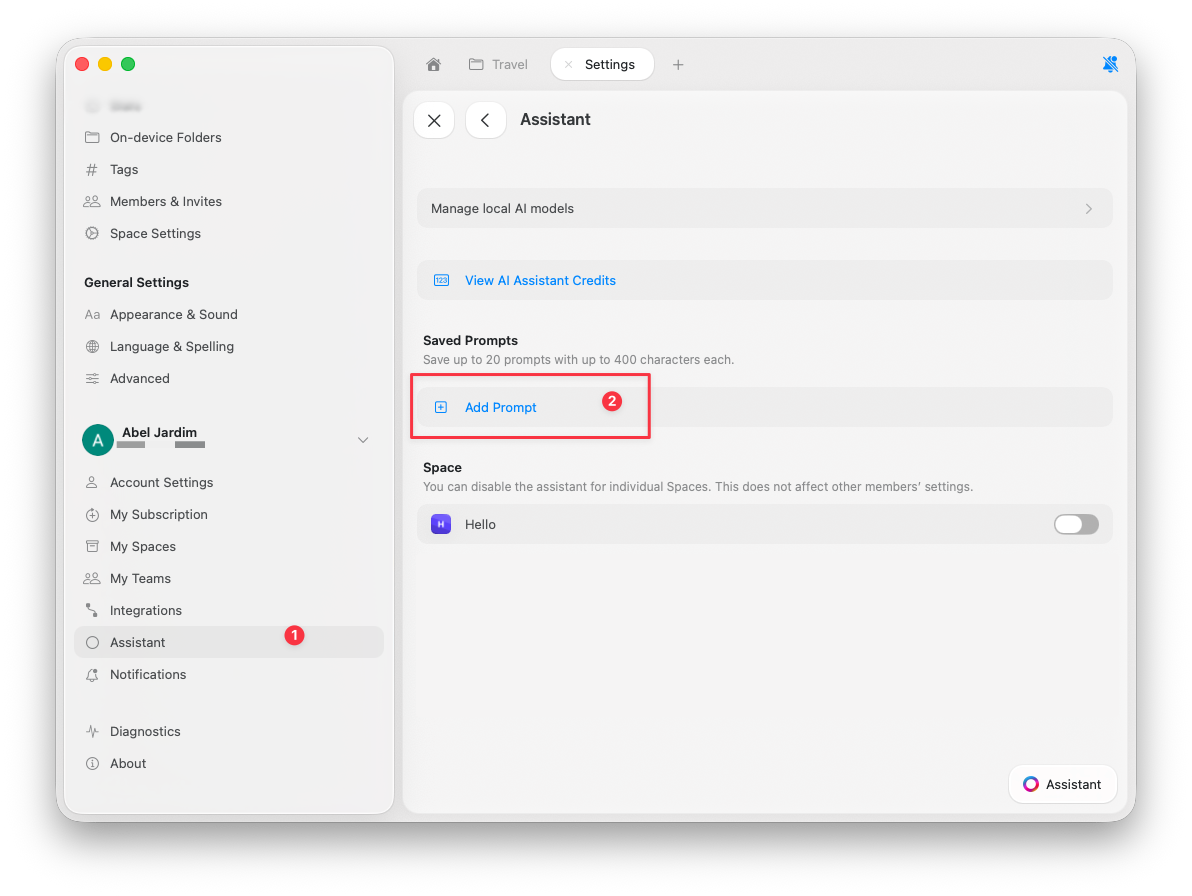
- Up to 20 saved prompts
- Maximum 1,000 characters per prompt
Using custom prompts
You can search prompts by name in the Assistant panel.Editing prompt support
Editing-oriented prompts require Execute mode with a Fast or Max model.Managing your prompts
Edit a prompt:- Go to Settings → Assistant → Saved Prompts
- Select the prompt
- Update title or content
- Save
- Go to Settings → Assistant → Saved Prompts
- Click delete on the prompt
- Confirm
Related Articles
Using Craft Assistant
Learn the basics of working with the Assistant
Editing with Craft Assistant
Apply prompts directly to documents in Execute mode
Choosing AI Models
Select the right model for your prompts
Formatting
Create prompts for consistent text formatting and styling