

Publishing a Document
Create a web link to make your document accessible to anyone on the internet.1
Click the Share button in the top-right corner of your document
2
Select Publish
3
Click Create Link to instantly generate and copy the web URL
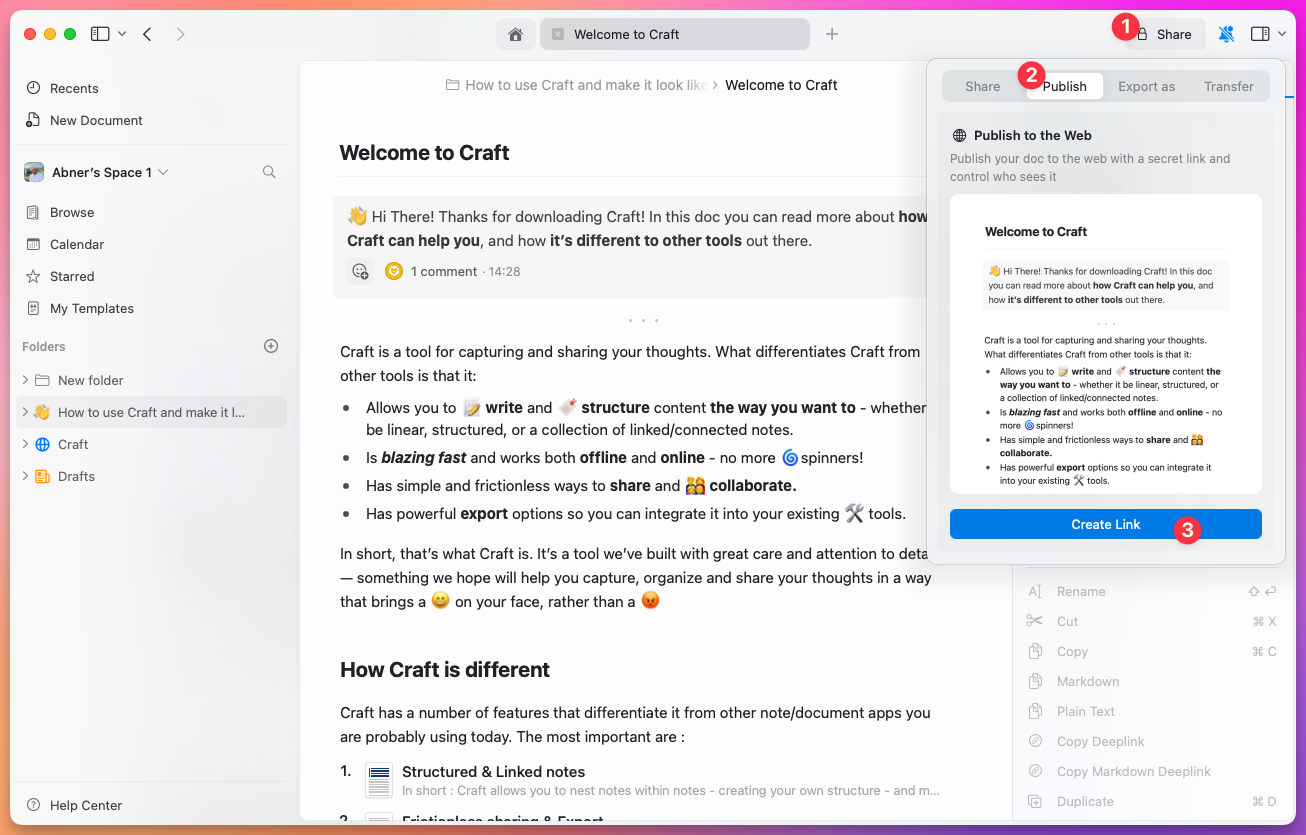
craft.me/s/abc123, but you can customize this.
Published Page Settings
Once a document is published, you can manage various settings to control access and appearance: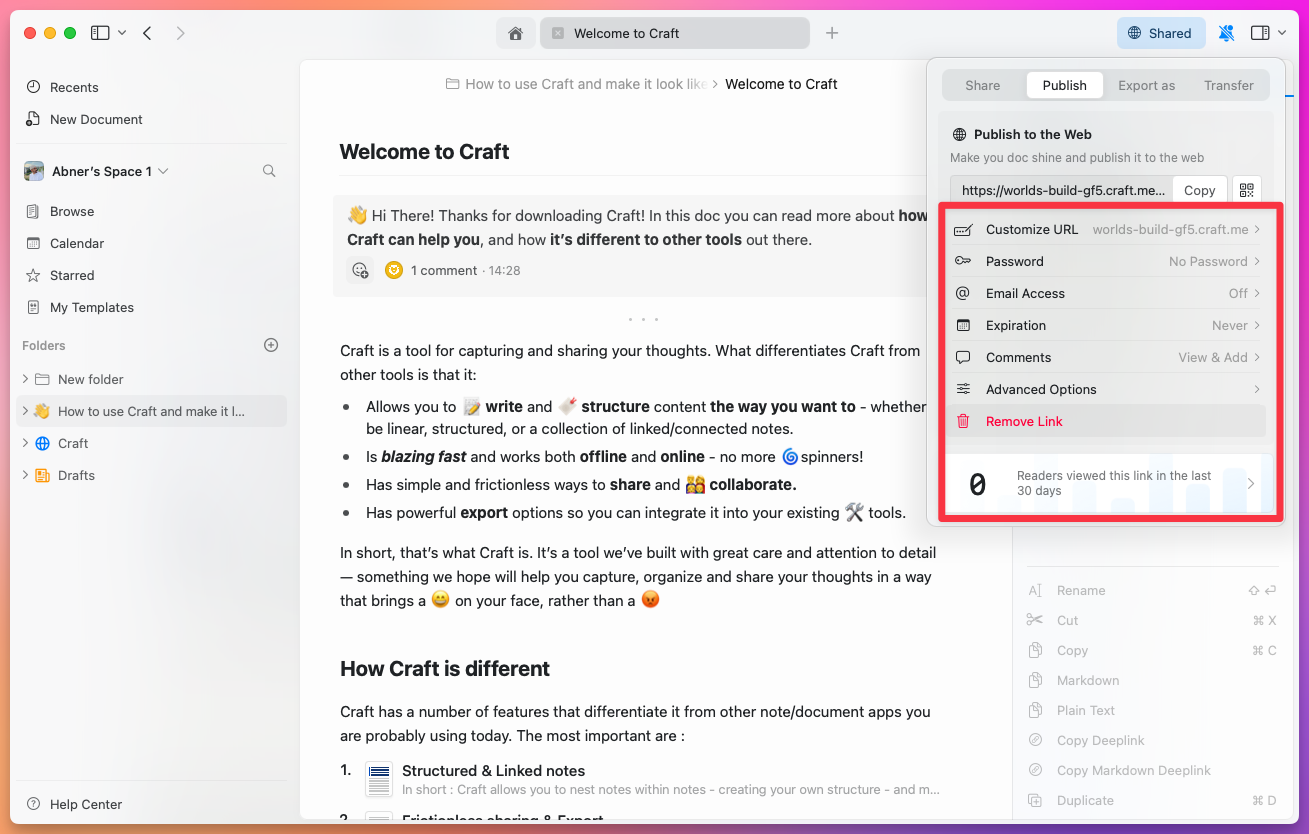
URL Customization
Craft Domain - Personalize your Craft domain from the default random format (e.g.,brave-lion-456.craft.me) to something memorable like yourname.craft.me. Available on all plans including Starter.
Custom URL Path - Define a personalized pathway for your link (e.g., /amazing-content instead of /s/abc123)
Custom Domain - Connect your own domain to publish under your brand (e.g., blog.yourcompany.com). Requires Plus or higher plan.
QR Code - Generate a QR code for the published link, useful for sharing in print or on screen.
Security Options
Password Protection - Require a password to access the document. Only people with the password can view the page. Email Domain Restriction - Limit access to specific email domains (e.g., only@yourcompany.com addresses)
Expiration Date - Set a date when the link automatically becomes unavailable
Search Engine Indexing - Control whether search engines can index your published page. This is separate from the search option under Advanced Options, which controls search within the page itself.
Engagement Controls
Comments - Enable or disable the ability for readers to comment on the published page Advanced Options - Control visual appearance and user interaction features:- Table of contents visibility
- Search functionality
- Print options
- Page navigation
Management
Remove Link - Unpublish the page to immediately make the web link unavailable. The document remains in your Craft workspace.Presentation Mode
Transform your documents into engaging slide presentations directly within Craft. On published documents, click the play icon in the top-right corner to start presenting. On Mac, you can also present directly from the editor: open the Info ⓘ panel and choose Present in the Actions tab.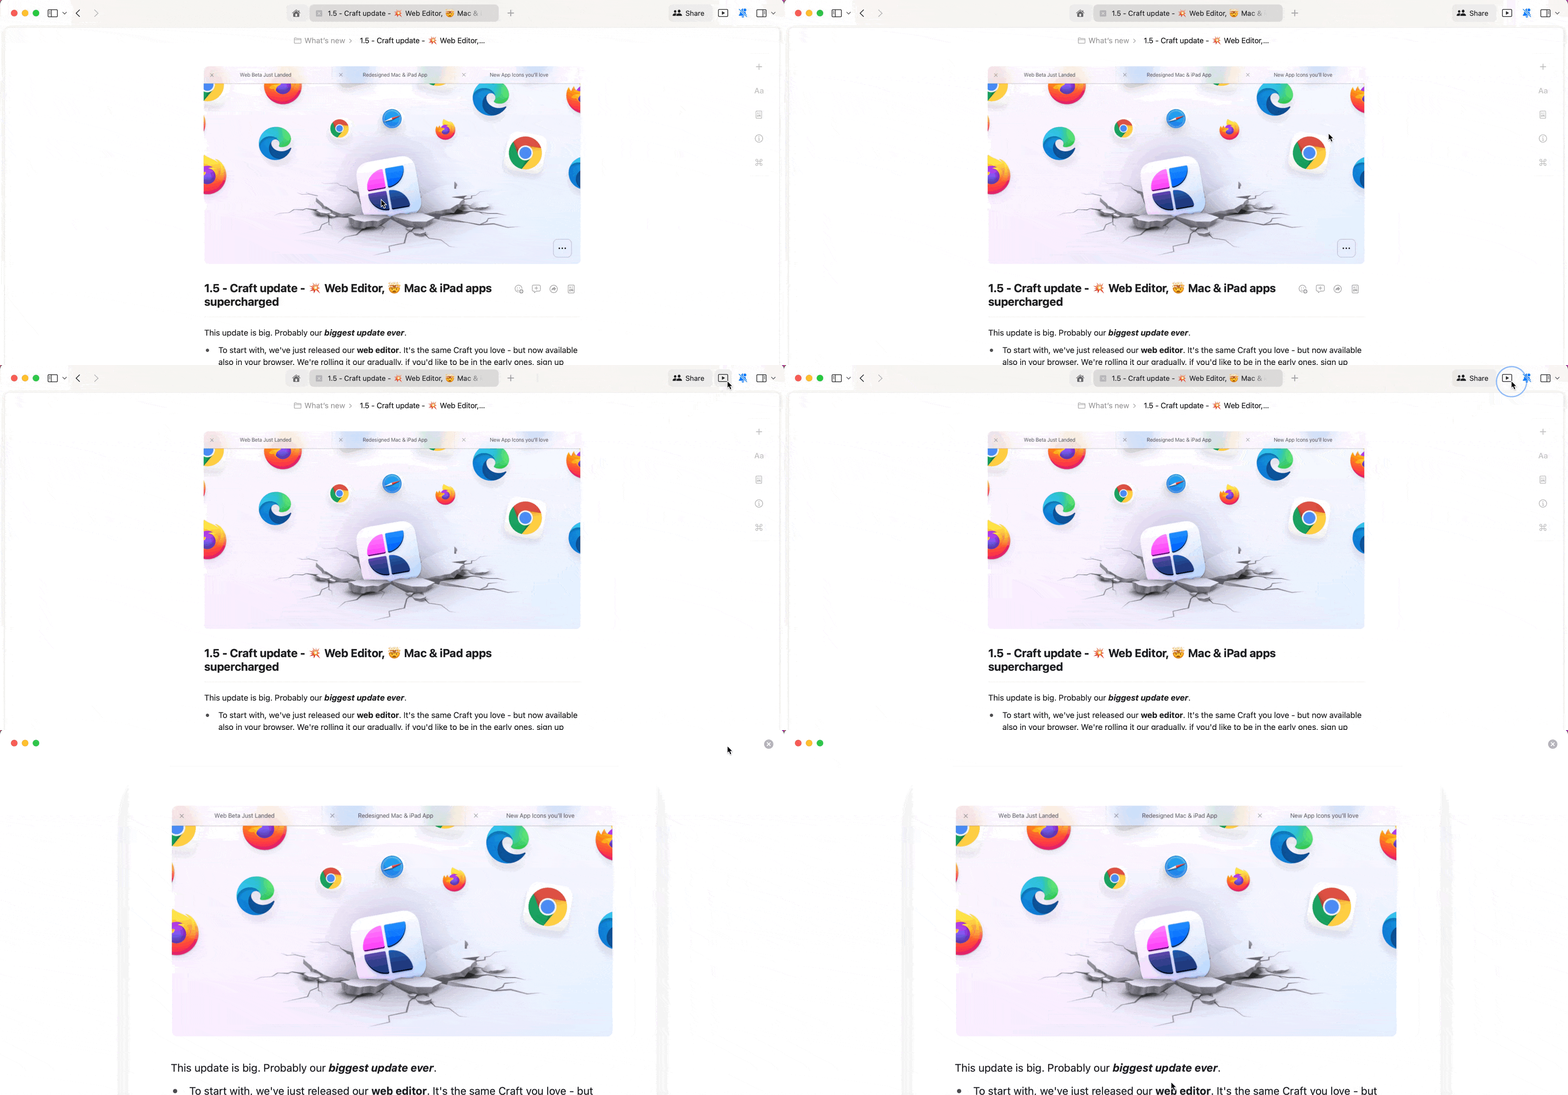
Creating Slides
Use separators to divide your document into individual slides:- Navigate through your document and decide where slides should split
- Insert a separator at these points using the slash menu (type
/and pick a separator style)
Use
Cmd + Arrow keys on keyboard or swipe on touch devices to navigate between slides during presentations.Presentation Best Practices
- Keep It Simple - Use bullet points and concise language
- Visual Appeal - Incorporate images, graphs, and tables
- Consistent Styling - Maintain uniform fonts, colors, and sizes